

This was originally published as two features: “Converting Analogue to Digital” and a supplementary hardware guide/reviews. I have joined them together for this page, but feel free to jump to the Hardware Reviews Section, if that’s what tickles your fancy.
Adding your old LPs and tapes to your digital library isn’t so hard after all.
A great portion of my music library isn’t in digital form – and while vinyl is attractive and fun to listen to, it’s certainly not convenient. Thankfully, converting your records or cassettes to digital form isn’t too hard at all.
Now, like skinning an Eastern barred bandicoot, there are many ways in which to set up this task, each with varying costs and benefits. However, they all require significant commitment – the recording is done in real-time, so, with preparation and clean-up, you’re looking at about an hour per LP, although you’ll get faster over time.
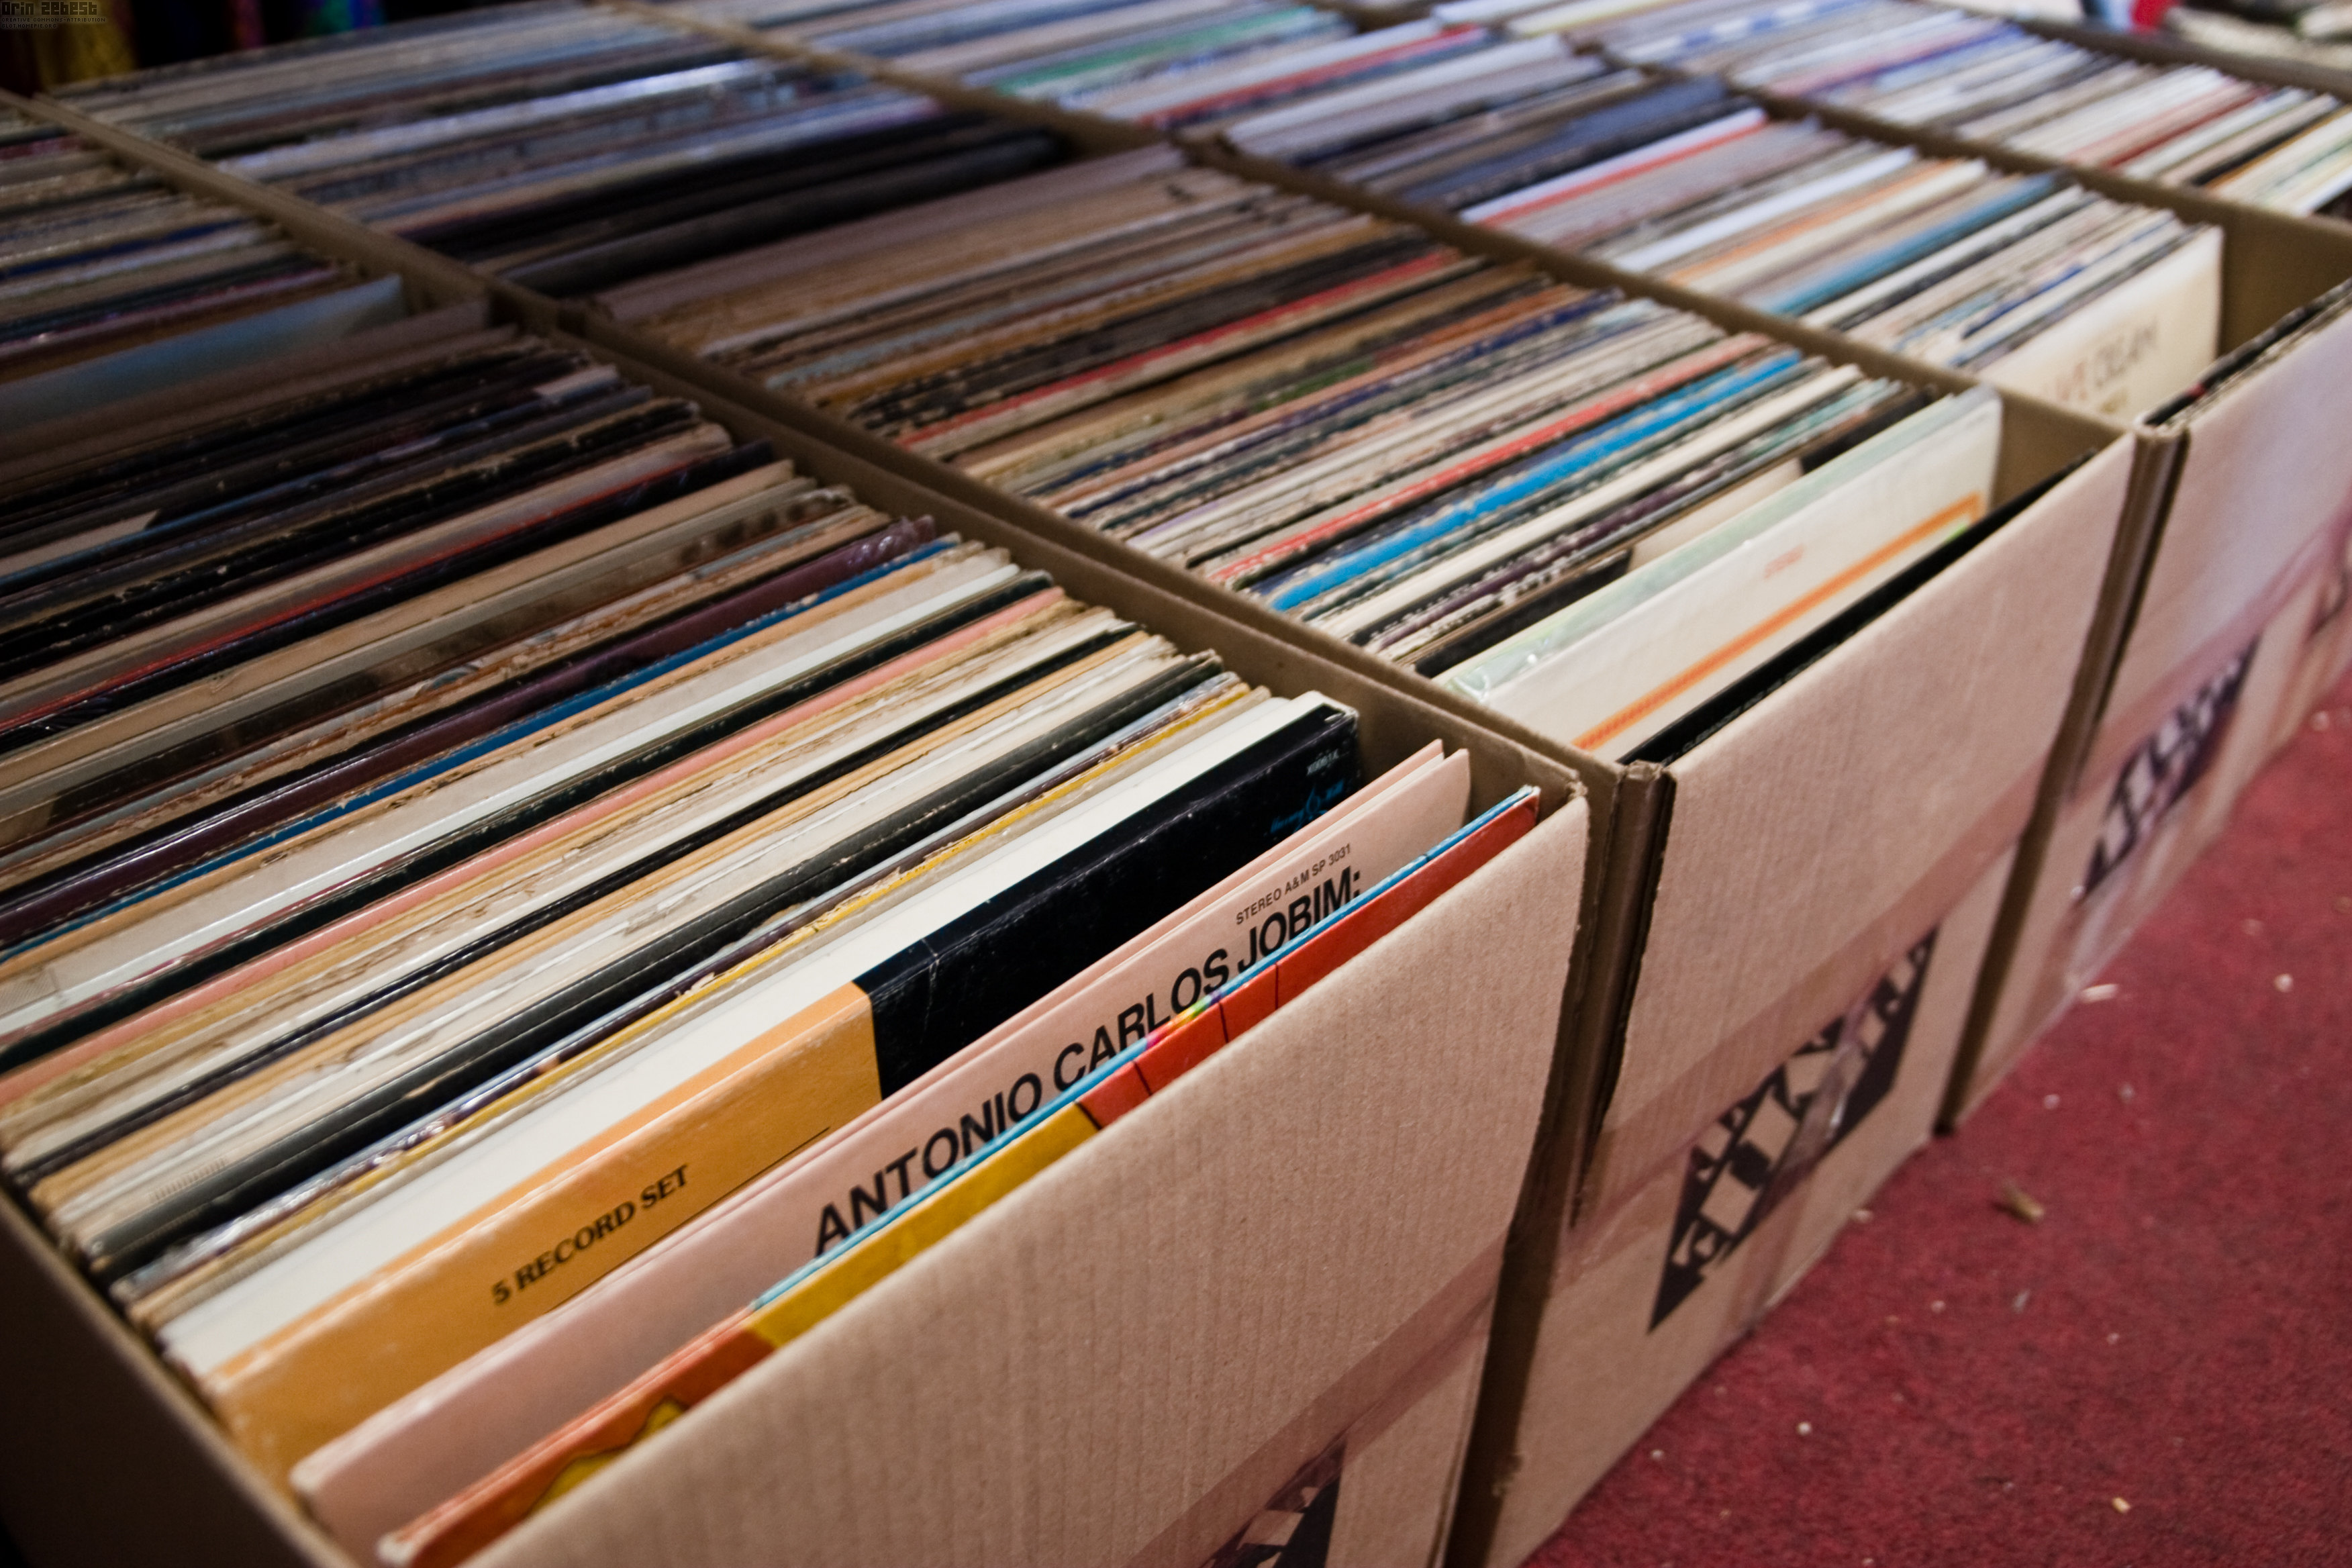
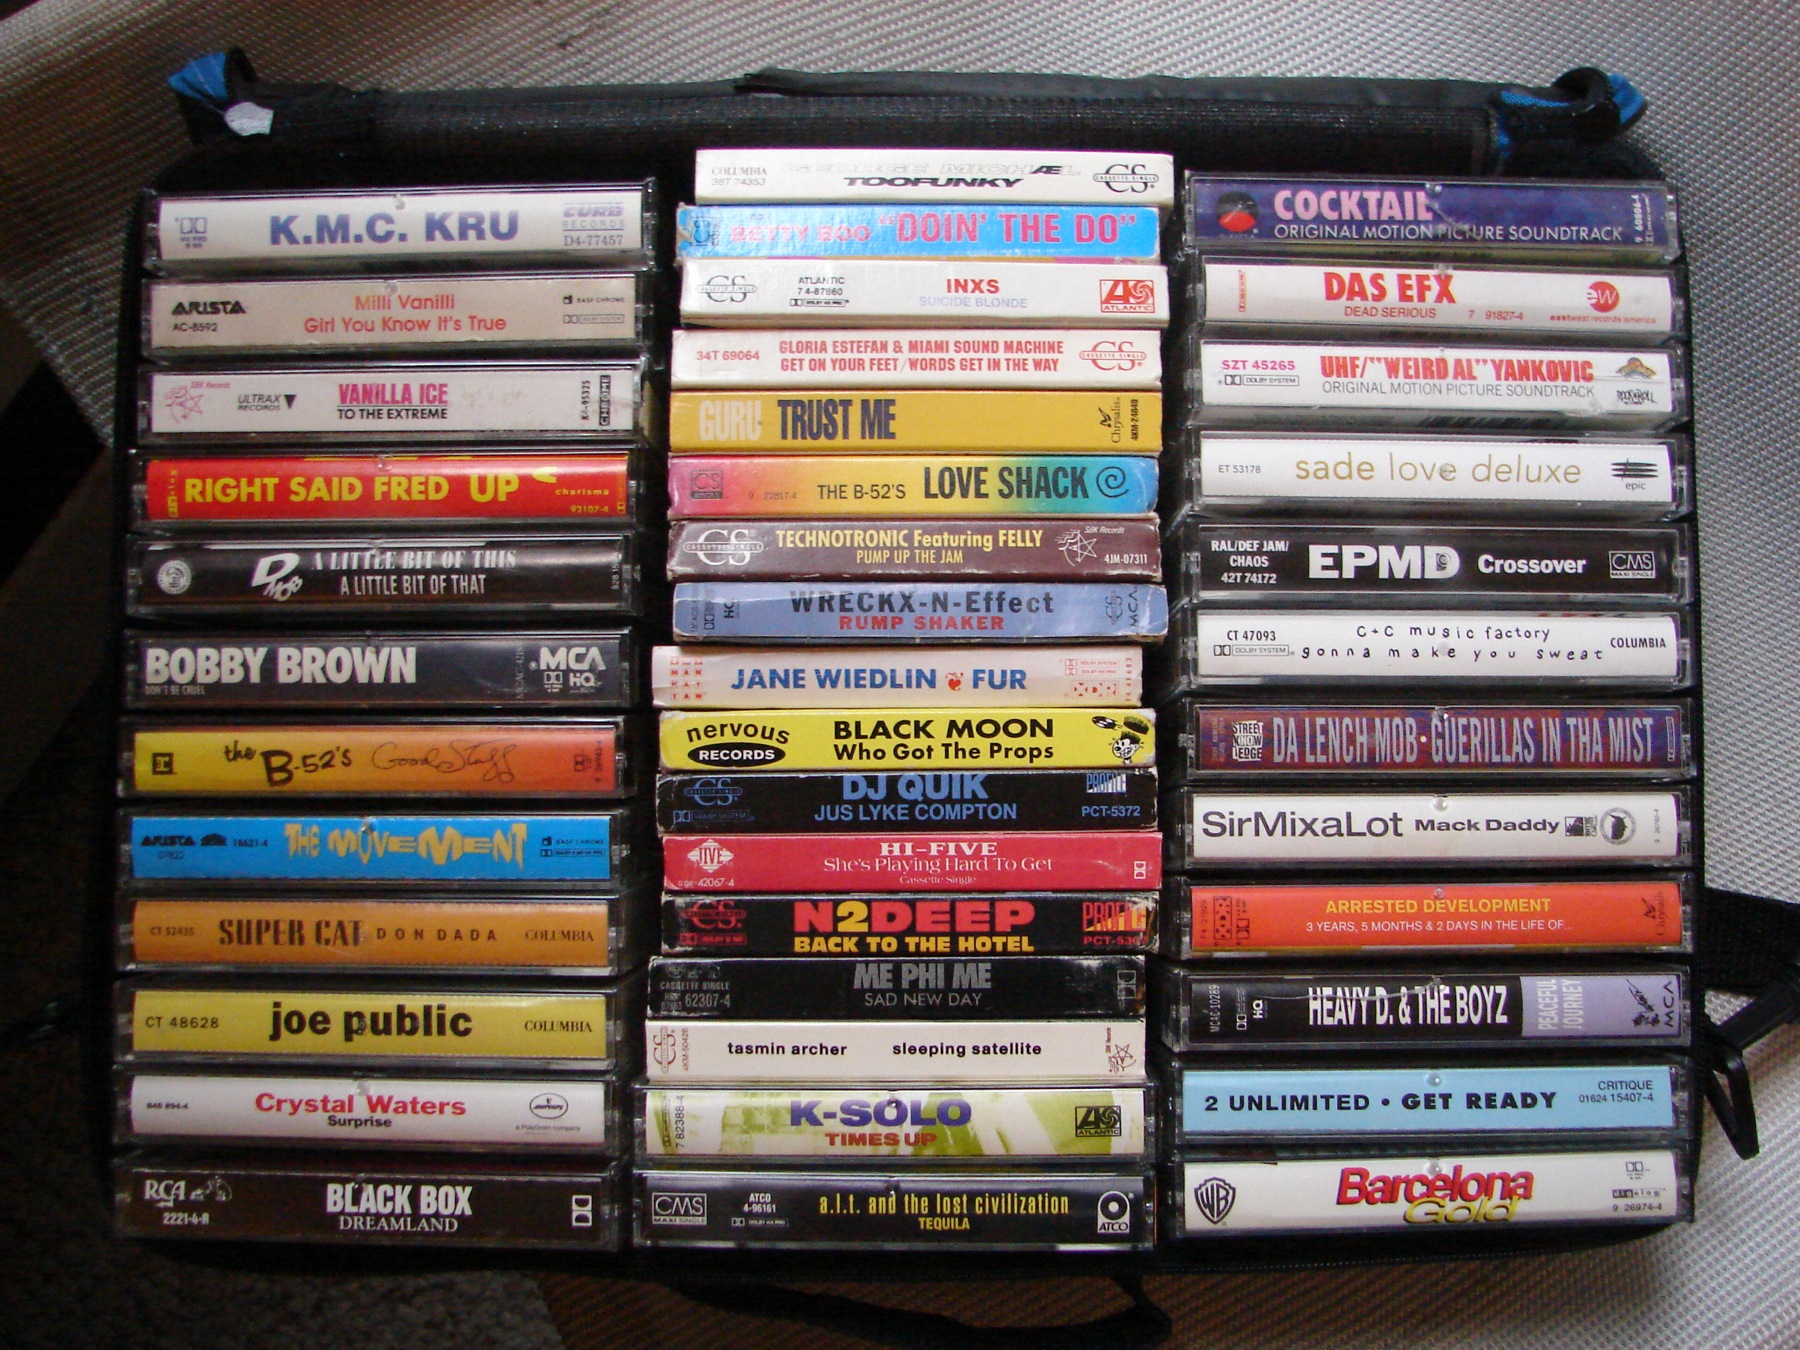
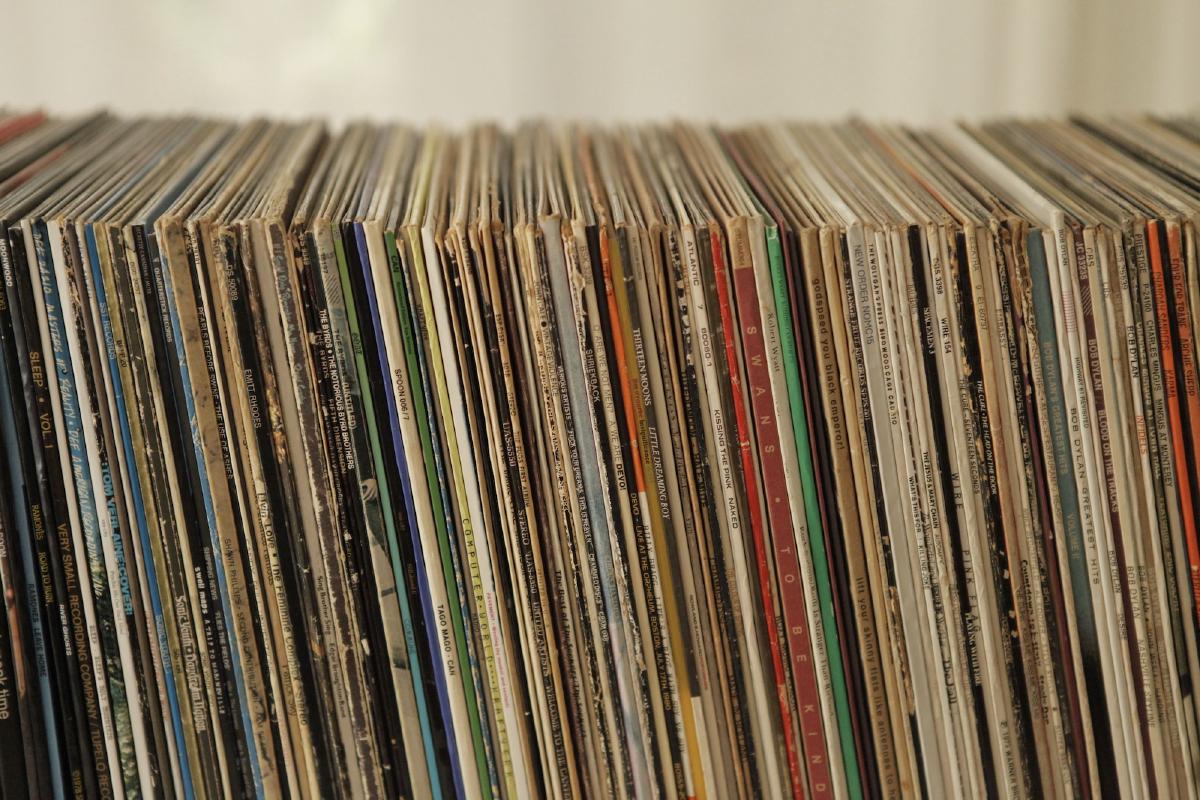
RecordCollection.jpg: CC BY 2.0 Flickr user Orin Zebest. TapeCollection.jpg: Tapes: still cool. CC BY 2.0 Flickr user Penningtron.
Recording cassettes is pretty easy to set up, as the line-out of your cassette player can just connect directly to the line-in (usually marked blue) of your computer’s soundcard. Note that a ‘microphone’ input won’t do (the reddish one), unless it can be changed to a ’line-in’ through software (the levels will be all wrong, otherwise).
Traditional record players, on the other hand, don’t have outputs that conform to the line-out standard. This is because the grooves on a record don’t actually output a standard soundwave – to better reduce wear on the record, and fit more music on its surface, the soundwaves are put through an equaliser (known as the RIAA curve) before being pressed to the record. The resulting output has to then be put through the inverse of the RIAA curve to sound ’normal’ again. This is why vintage amps have ‘phono’ inputs, as those inputs contain the necessary equalisation (as well as some gain), and why – if you’ve ever accidentally hooked your mp3 player to the phono input – it sounded terrible.
However, many modern record players have the RIAA equalisation built in, and can output their signal at line level. If your record player does, then you can just hook it up directly to the line-in on your soundcard. If not, you’ll require either a soundcard with a phono input (rare, but they exist), or an external phono pre-amp hooked up to a soundcard with a good quality line-in (one designed for a home studio). Alternatively, you can use the ’tape out’ of your phono-equipped amp, and hook that up to your soundcard.
Additionally, some record players come equipped with USB, providing your computer with a digital signal that it can record directly from. Depending on your turntable, this will be of varying quality. Like with turntables in general, avoid the cheap ones from electronics stores or online retailers.
Obviously, if you’re going to go to the effort to archive your analogue collection, you’ll want the best quality possible, so it’s recommended to use a good turntable with a good cartridge (I just so happened to review some, below) – perhaps a friend can lend you theirs if yours isn’t quite up to scratch. You’ll also want to make sure your records are squeaky clean, so as to minimise the hissing and number of pops and crackles.
Your records should be as clean as possible in order to get a transfer with a minimum of pops and crackles. You can pick up some spray n wipe style cleaning solution from your local record store, or else use lukewarm water mixed with a little dish washing detergent, wiping your records with a soft, clean washcloth while keeping the labels dry. Rinse in lukewarm water until all the detergent is gone, then rinse in distilled water, and allow them to dry.
Even after cleaning with a solution I’d still recommend going over each record with a record cleaning brush one final time before you start recording.
The Audacity manual offers some useful information on how to connect all your audio equipment together for recording, which is also worth a read.
Onto the recording #
Once your record player is hooked up to your computer – whether it’s via a direct USB connection, or connected to your soundcard – you’ll need to use some software to actually record what it’s playing.
For this guide, I’ll use Audacity, as it’s free, powerful, and works on Windows, Mac, and Linux.
A thorough workflow for digitising records is available in the Audacity manual, which covers a lot more of the available tweaks.
If you’re recording your cassettes, I’d really recommend cleaning the heads of your cassette player first. A thorough guide, which also covers azimuth, faults, and more, is available on the Audacity wiki.
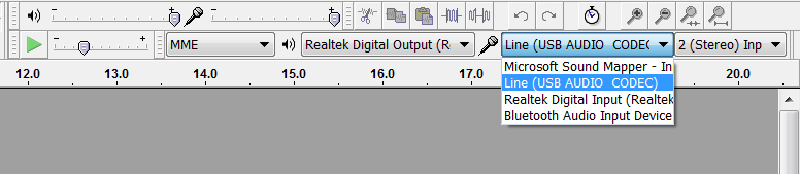
Upon opening Audacity, you’ll need to select the record player or correct soundcard input as your recording source on the Audacity Device Toolbar, located on the top right of your screen (USB turntables are often labelled as ‘Line (USB AUDIO CODEC)’), also make sure that ‘stereo input’ is selected.
Your USB turntable or soundcard will have recommended quality settings mentioned in its manual (it’s related to the capabilities of the in-built analogue to digital converter), so stick to those (in the case of the Pro-ject turntable, it recommended 16-bit, 48 kHz, but the m-audio soundcard was 24-bit, 48 kHz). Some may even support 24-bit, 192 kHz.
Audacity projects, by default, record and save at 32 bit, downscaling to your desired bit-depth at the time of export. However, it records by default at 44.1 kHz. In the case of the Pro-ject turntable, it recommended recording at 48 kHz, so I set this in the drop down box at the bottom left of the screen. If your soundcard supports greater sampling rates, you might as well go all out and select 192 kHz, then just down-sample when exporting (there is no real benefit to listening at these sample rates, however - see the September 2013 issue of TechLife for my thoughts on that topic). Keep in mind that, if you wish to keep your ‘master’ recordings, 192 kHz files will take up several times more space than if you were to record them at 44.1 or 48 kHz, with little to no sonic advantage.
Now is a good time to name and save your Audacity project. These project files can be considered the masters, and should be archived as such – I’d recommend keeping them on an external drive. I name mine ARTIST – ALBUM [CATALOGUE#].
Setting the levels #
It is imperative when recording from an analogue source to make sure that your levels are set correctly: if they are too high, your recording will clip and distort; too low, and you’ll have to boost the recording in post-production.
To get your levels right in Audacity, it’s recommended to play the record through once before recording, monitoring and adjusting the peak levels as it plays.
To monitor the levels without recording, enable the “Software Playthrough” option in the Transport menu, then click the microphone icon on the Meter Toolbar. I’d recommend using headphones for this (and during recording), so that any output from the speakers doesn’t get picked up by the needle on your turntable.
Next, drop the Input volume (the slider to the right of the microphone icon on the Audacity Mixer Toolbar) to zero, then start your record playing, and slowly drag it to the right, as there can be huge variation between devices – the Pro-ject turntable I reviewed required a very low 0.02, while the Audio Technica turntable had to be up at maximum.

You should try to aim for a maximum peak of around -6.0 dB, but occasional spikes to -3.0 dB are ok. I’d recommend enlarging the Meter Toolbar by clicking and dragging it, so that you can more accurately see the peaks.
I’d also recommend enabling sound activated recording, also under the Transport menu, so that the recording doesn’t start until the needle is on the record (you still need to press the ‘record’ button as usual), and will automatically pause when lifted. The sensitivity of this can be adjusted, if it doesn’t behave as well as you’d like.
Recording each side #
Once you’ve begun recording, let the record play through. Once a side has finished, hit stop. Then, flip the record, give it a quick brush, hit the ‘record’ button again to start a new audio track, and drop the needle. If you’re monitoring your recording, you’ll want to mute the previously recorded side by pressing the ‘mute’ button on the left-hand side of the waveform window.
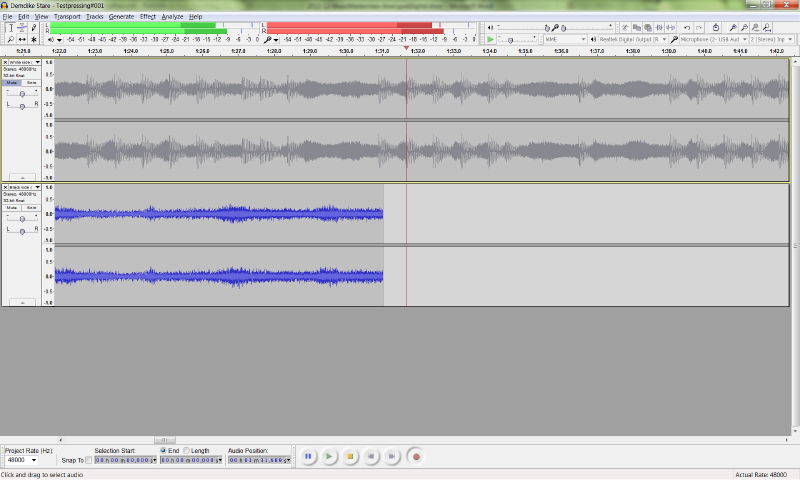
There is a chance that Side B may be recorded at a different level, so if on this side, your meters jump too high, adjust them to keep them peaking around -6db (a little bit over is fine, but keep it below -3db), then stop the recording, close the audio track in Audacity (leaving your Side A recording open), and hit record to start again with the newly adjusted levels.
Post-recording clean-up #
Once you’ve recorded a record (ahem), you may wish to give it a bit of an audio clean-up. Audacity can do this, but there are also other programs out there that do a much better job of it (I’ve heard that Izotope’s RX3 software gives results that are something close to miraculous, but at US$249, you’d hope so) [Ed: the current version of the sftware is now RX12, and it’s £389].
Keep in mind, that if you decide to do some audio clean-up, it will overwrite your ‘pure’ master recording, so, before you do so, I’d recommend saving a second, archival copy of the project. I recommend this so that if at a later date you decide to fork out for some higher-quality de-click or other audio clean-up program, or if you accidentally apply some damaging effect, you don’t have to re-record your records again.
To remove clicks through Audacity, go to Effect -> Click Removal. There are other, more time consuming, methods available if this doesn’t work, covered here, but you’ll probably get the best results from other programs, such as ClickRepair (free), Goldwave (US$19), or the above mentioned studio-grade RX3 (US$249).
Now, because we set our levels conservatively to avoid clipping, it’s possible that the recording you just made may sound quieter than most. You can permanently ’normalise’ the recording, which will bring it up to a level closer to standard, or use the non-destructive ‘Replay Gain’ on your player of choice (or iTunes’ equivalent, known as Sound Check). This simply embeds information in the tags of your files, and adjusts volume on the fly. That way, the actual sound files remain unaltered.
If this isn’t suitable for your player of choice (you may be burning the files to CD, or your mp3 player just doesn’t support it), you can normalise in Audacity under Effect -> Normalize. Just leave the settings as-is. I’d recommend removing clicks from your recordings before normalisation, as they can erroneously affect the levels.
Splitting the tracks #
The final stage of recording is removing the bits of silence at the beginning and end of the recordings, and then dividing the record up into its component tracks.
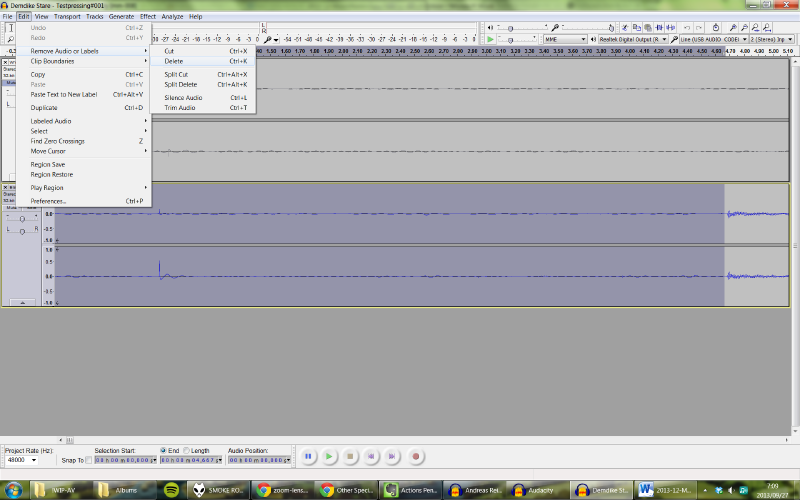
Before we begin deleting the lead in and out of your recordings, make sure that ‘Snap to’ is off in the selection toolbar down the bottom. Next, press the skip to start button (the rewind icon), and zoom in as far as you can while keeping both the start of the track and the start of the music on-screen. Then, simply highlight the unwanted portion by clicking and dragging, then click Edit -> Remove Audio or Labels -> Delete. Do the same for the end of the recording, too.
Now is a good time to save your progress. You might also want to add some silence between the sides of the record. To do this, click on the very end of Side A (zooming will help), and then choose Generate -> Silence, and add 2 seconds.
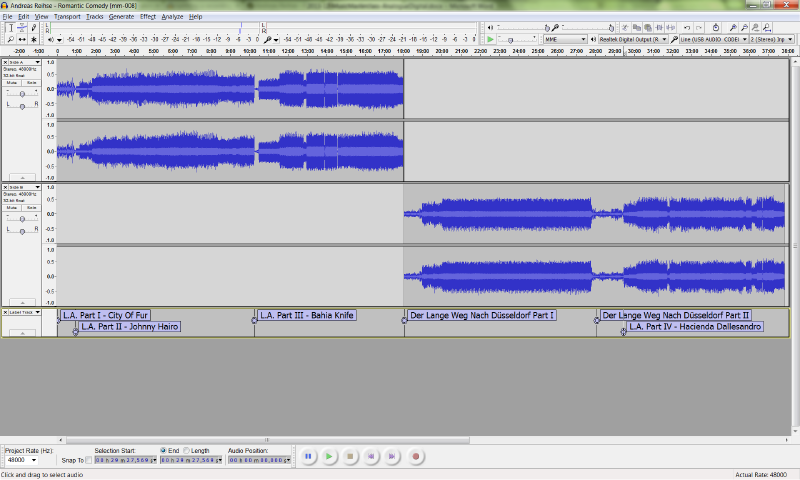
Now you need to align the two tracks in your project so that Side B sits after Side A on the timeline. Select your two tracks by holding shift and clicking on the left pane of their windows, then choose Tracks -> Align Tracks -> Align Tracks End to End. Now that your project is one continuous sound file, we can add track labels.
Again, press the skip to start button, then press Ctrl + B (or Tracks -> Add label at selection), and name the first track. Then, find the next tracks by either looking up track lengths on discogs.com, or looking for obvious silences. Zoom in for detail and place the cursor at the beginning of the next track, then press Ctrl + B again, and name the next track. Do this for the remainder of the tracks on both sides.
Exporting #
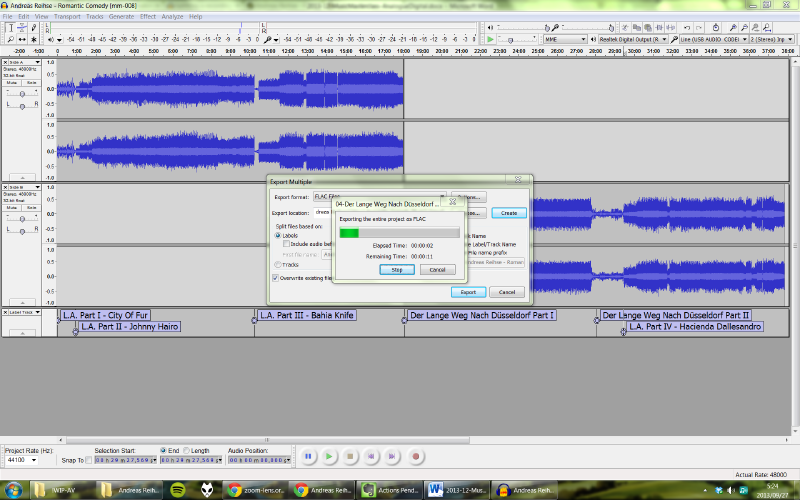
Now, it’s finally time to export your recording into separate tracks, ready for use on your digital device of choice. If you recorded at a sample rate higher than 44100Hz, I’d recommend down-sampling for maximum compatibility (your ears can’t tell the difference) – just change the ‘Project Rate’ in the bottom left corner to 44100.
You should also go to File -> Edit Metadata, and enter as much info as you can (metadata is your friend), with the exception of track names, as they are handled by labels.
Next, select File -> Export Multiple… and choose your preferred format. My preference is the lossless format FLAC for home listening, which you can later be transcoded to a smaller, lossy format for portable use. However, if you wish to jump straight to mp3, then you can do that here, too.
Make sure that ‘Split files based on:’ is set to ‘Labels’, and that ‘Name files:’ is set to ‘Numbering before Label/Track Name.’ Then hit Export. After confirming each track’s metadata, it’s time to sit back and relax – you’re done.
Buying the right equipment #
In order to digitise your precious analogue collection, you’re going to need some decent equipment. If you’re new to analogue (or looking for an upgrade), you may want to buy a new USB turntable, or else you can use your existing one and pair it with a good quality soundcard – even if it has phono outputs – which will also allow you to transfer tapes at decent quality.
Pro-Ject Debut Carbon USB #
Audiophile-grade sound, minimal design.
Score: 4.5 | Price: ~$585 | Online: project-audio.com
Critical specs: Belt drive; 68dB SNR; wow & flutter 0.1%; weight 6kg; USB connection; line-out; Ortofon cartridge included; available in red, white, or black.
I must confess: I’m a little in love with this unit. It feels… complete. This is a funny feeling to have for a unit that is deliberately lacking in features largely considered standard – there is no speed selector switch (to change the speed, you have the lift up the platter and change the belt from one spindle to another); no auto-return (if you’re out of the room when your record ends, it’ll just sit there clicking incessantly); and no auto-start (a flick on the underside edge of the turntable starts the platter spinning).
How, then, can I fall in love with something so unapologetically inconvenient? Because these measures are done in the name of purity. There are no extraneous parts here to cause unwanted vibrational or electrical interference – even the power supply is external. And this simplicity is manifest in the unit’s greatly appealing minimalistic aesthetic that just gets my toes a-curling. And it’s in red.
Yet, it does contain a few current-day upgrades over tables of yore: it’s equipped with a line-out, with no option for phono – forcing you to use the (very adequate) on-board RIAA equalization; and a USB connection for on-board analogue-to-digital (A/D) conversion and transfer to your PC. Purists will likely scoff at this option, instead preferring to use their own A/D converter, however, I found the results to be very pleasing, and the added convenience of doing away with a soundcard worth the ~$150 upgrade from the – otherwise identical – (USB-free) Debut Carbon (which additionally comes in blue, green, or yellow).
The build quality is absolutely superb: both the platter and the base have a pleasing heft, and the carbon fibre tonearm is as light and maneuverable as a feather. One other inclusion that really sets Pro-Ject apart from other turntable manufacturers is the inclusion of an Ortofon cartridge – which will best just about any other stock cartridge in this price range.
Audio Technica AT-LP120-USB #
Legendary Technics design, fraction of the price.
Score: 4 | Price: ~$480 | Online: audio-technica.com
Critical specs: Direct drive; >50dB SNR; wow & flutter 0.2%; weight 10.7kg; USB connection; selectable line- or phono-out; Audio Technica cartridge included.
This turntable is based on the legendary Technics SL-1200 – the most popular turntable for DJs, and a piece of equipment that “helped shaped the world we live in” (according to the London Science Museum), with many units still chugging after 40 years. The nod toward this legend is clear in its near-identical appearance and feature set. The biggest difference between the two, though, is the price – the Audio Technica is about a third of the cost of Technics version. This cost discrepancy is manifest in the abundance of plastic, and lack of dampening (making this turntable a little less appropriate for DJ use).
But, if you step outside of the behemoth’s shadow and consider the unit on its own merits, it’s still a solid performer. The tone arm is fully adjustable, including height adjustment for really thick records or mats. It’s also laden with extra features that will appeal to DJs (and probably nobody else), including speed/pitch adjustment, forward and backward queuing, a high-torque motor (better for queuing or scratching), a light to help with queuing in dark places, and stroboscopic speed indicators.
The included cartridge doesn’t measure up to the Ortofon one included with the Pro-Ject, but it’s upgradable if you’re looking for something a little more refined.
It also has a USB connection for direct-to-PC recording, as well as a line-out, and – unlike the Pro-Ject – a phono output, for connection to your vintage amp or pre-amp of preference.
Overall, I found the recordings just a little less detailed than with the (admittedly, more expensive) Pro-Ject, but they were still a pleasure to listen to. As a matter of fact, as I sit here writing this, I’m listening to Kruder & Dorfmeister’s K&D Sessions via headphones, and it’s been one of the more enjoyable listens of the album, revealing details I’d previously missed.
TCC TC-750LC Audiophile MM Phono Preamp #
A super cheap, solid performer, increasing turntable flexibility.
Score: 5 | Price: ~$50 ex shipping | Online: phonopreamps.com
Critical specs: RIAA deviation response +/- 0.5db, 20hz-20KHz; THD Less than 0.05%; >85dB SNR; Output adjustability >85dB.
Chances are that, if you already have an extensive vinyl collection, you already have a turntable, and aren’t looking to rush out and buy a whole new one just to digitise a selection of your collection. However, to hook your vintage turntable up to your PC, you’re going to need a phono pre-amp in order to provide the soundcard with the line-level signal that it requires.
A cost-effective, and sonically satisfying phono pre-amp is required, and the TC-750LC fits the bill nicely. The spec sheet is very impressive, and the sound it generates certainly worth the budget price – it may even out-perform the phono stage built into your amp.
Audio purists may balk at the AC adapter (they often introduce radio noise, and the one included is of budget-quality), but its low power consumption means that you could easily run it off of some batteries, giving you the best possible signal for <$100.
This model includes an adjustable line-level, so you can achieve a perfect line level in the analogue stage (rather than digitally in software), which is appealing for recording, but you can save $5 and get the TC-750 if you’re not interested in such twiddly bits.
It is worth noting that it’s nowhere near the best phono pre-amp out there – but, being bested by units costing 4 or 5 times the price is hardly surprising.
M-Audio M-Track USB soundcard #
Pro-grade audio recording for instruments and vinyl.
Score: 4.5 | Price: ~$129 | Online: m-audio.com
Critical specs: 24-bit / 48 kHz processing; zero-latency monitoring; 2x XLR mic inputs; 2x 1/4" line inputs with independent gain and 96dB SNR; balanced outputs; headphone out with monitoring; USB powered; Mac compatible.
The M-Track is designed for home-studio recording, with a set of two mono inputs, either of which can run a microphone, guitar, or line-in. The two inputs will work as left and right channels in Audacity (or your recording software of choice), so it’s ideal for high-quality A/D conversion of your phono pre-amp or line-level turntable’s output. Better yet, the unit includes independent line-level controls on the device itself (including LED line meters for monitoring clipping), so you can make sure that the channels are even during the recording (more often than not, one channel is louder than the other).
The components are ‘studio grade’ and it’s ASIO compliant, too, meaning you can install the ASIO drivers (and compile the ASIO version of Audacity) for zero-latency recording – which is, admittedly, more useful when recording your own compositions, rather than your LPs.
It also includes a headphone monitor port, and a dial to fade between monitoring the analogue input, and the digital return from your PC – allowing you to judge latency, and compare any digital effects, which is – again – a little more useful for home recordings than digitisation.
However, if you have even a little bit of a maestro in you, the double-duty of this sound card should be rather appealing – especially as it’ll help in resale value. The microphone inputs and Mac compatibility also mean that you can later experiment with a direct phono connection and the audiophillic (US$330) PureVinyl software’s implementation of RIAA (which you can learn more about at audiamorous.blogspot.ca).
Creative Sound Blaster Digital Music Premium HD #
The phono connection is handy, but crappy.
Score: 3 | Price: ~$120 | Online: au.creative.com
Critical specs: 24-bit / 96 kHz processing; 114dB SNR; line-in can record as phono-in; optical in + out; front panel volume knob, headphone out, and mic in.
The biggest appeal to me with this soundcard was its inclusion of a phono-input – meaning there was no need for me to hook up a phono pre-amplifier between my turntable and my PC. However, it doubles duty as a standard line-in port, and I couldn’t for the life of me figure out how to get it to do its phono thang. That is, until I installed the official Creative drivers (most other USB AD converters are happy to work out-of-the-box), which also installed registration software, and silly little sound-enhancement apps and replacements for the Windows sound controls. Worst of all, there was no way to just install the drivers. However, after installing the official drivers, there was now both a line-in, and a phono-in selectable from the Windows ‘Recording Devices’ window. Note than you have to select the correct one in Windows before opening Audacity – selecting the ‘phono’ input in Audacity while ‘Line-in’ is the default recording device in Windows won’t work.
After figuring all this out, the actual sound of the phono pre-amp was… disappointing. For a starter, it’s really noisy, even with the needle off of the record. To mitigate this, I reduced the recording level down to 0.66 in Audacity, but there was still some noise in the right channel, even with no needle contact. This noise wasn’t present on line-level recording, but it moots the standout feature of this otherwise generic (but acceptable) soundcard.