


Make your Tasks smarter with variables
In Part 1 of the Ultimate Tasker Guide, I introduced you to Android’s amazingly powerful automation app, Tasker, by covering the terminology that would help you create your tasks, and walking you through creating a simple Profile.
Now that we’ve covered the basics, and you’ve had a bit of time to play with the app and create your own Profiles, it’s time to get into the more powerful features: variables and Task ‘flow control’.
Variables #
Variables are little pieces of text, stored in memory, that allow information to carry over between tasks, within tasks, or from other apps or webpages. The information in a variable can be used to change the outcome of a Task, in a process known as ‘flow control’ (e.g. if this, then that), or to move dynamic data (such as the current weather, or the phone number of the person that just messaged you) from other Tasks, apps, or webpages for use in a Task – which we’ll cover in the next issue.
It’s also possible to use variable values as State Contexts for Profiles – meaning you can add a little more control over when Profiles activate or deactivate by changing the value of a variable in other Tasks.
Tasker has three types of variables: local, global, and built-in.
Local variables are used only within a single Task – no other Task can access what is stored in that variable. They consume fewer resources, so it’s recommended to use them where it’s possible.
Global variables are accessible by any Task, and are stored for as long as Tasker is running.
Tasker also includes built-in variables that provide system information – for example, the current time, battery status, the last app used, etc. A complete list, as well as some info on working with variables, is available for your perusal at https://tasker.joaoapps.com/userguide/en/variables.html.
Using variables in an ‘If’ statement #
The purpose of flow control is to make sure that your Tasks execute the right actions for your current situation – by carefully creating and using variables that represent these differences in situations, you can make sure that your Tasks do what’s right, every time.
Let’s walk through a typical example.
My ‘Work’ Profile automatically turns down all volumes – including the media volume – when I arrive at work. This can save an embarrassing moment when I open a video on my phone and the sound of a screaming goat blasts through the office, but it can also be annoying when I’m listening to music and the volume suddenly drops. To solve this, I’ve created a global variable called %AUCONN that has its value set to ‘1’ whenever I plug in my headphones or connect a Bluetooth audio device, and ‘0’ when disconnected. This way, I can have any Actions check this variable before changing media volume.
Creating variables #
Creating a new variable is actually the same process as setting one: within a Task, you just add the ‘Variable Set’ Action, and enter a name and value for your new variable. Variable names in lowercase will be local variables, and variables with one or more uppercase letters in their names will be global variables.
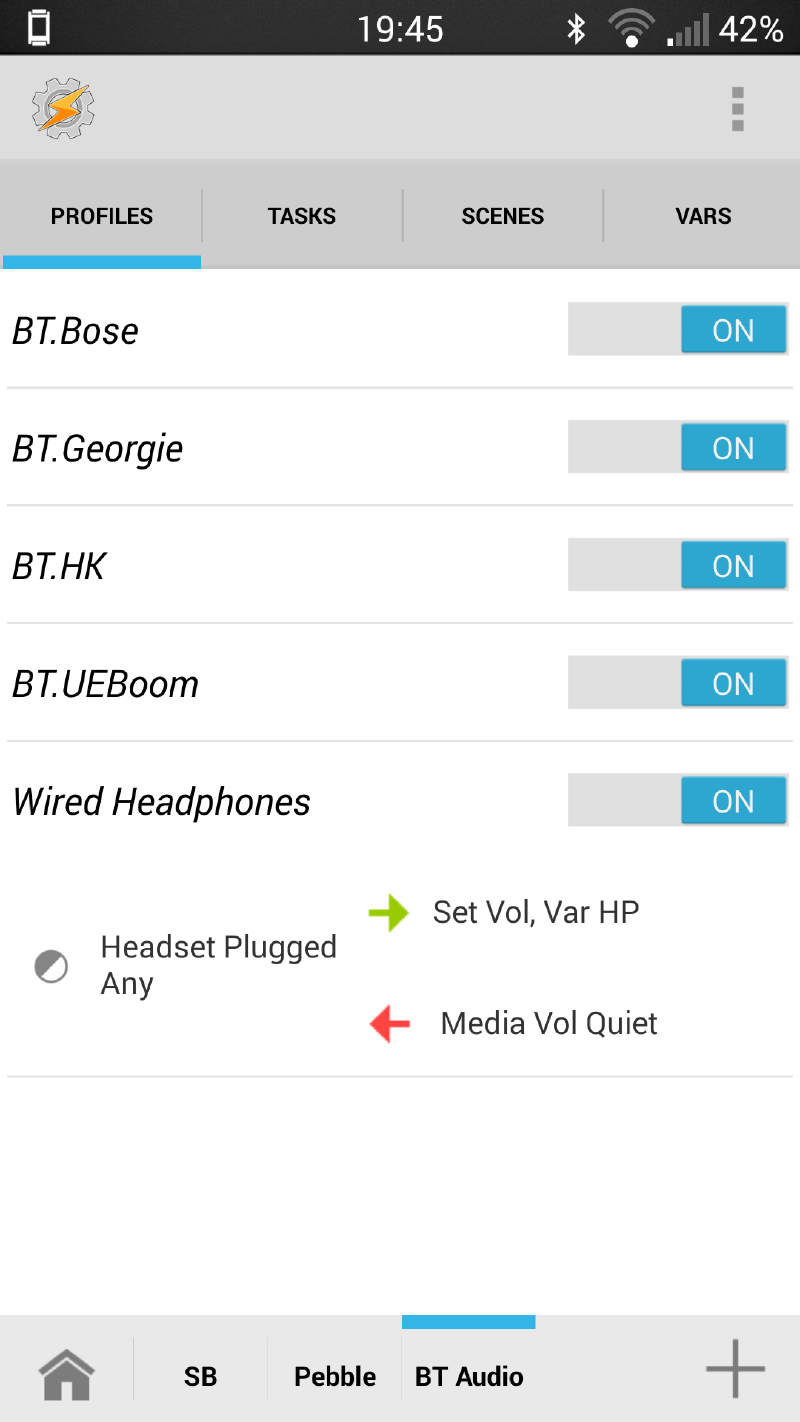
I have a Profile based on the ‘Headset Plugged’ state, as well as one Profile for each of my Bluetooth audio devices (the ‘Bluetooth Connected’ state, with a MAC address defined), which trigger a ‘Variable Set’ Action that sets %AUCONN to ‘1’. In the Exit Tasks for these Profiles, I include a ‘Variable Set’ Action that sets %AUCONN to ‘0’.
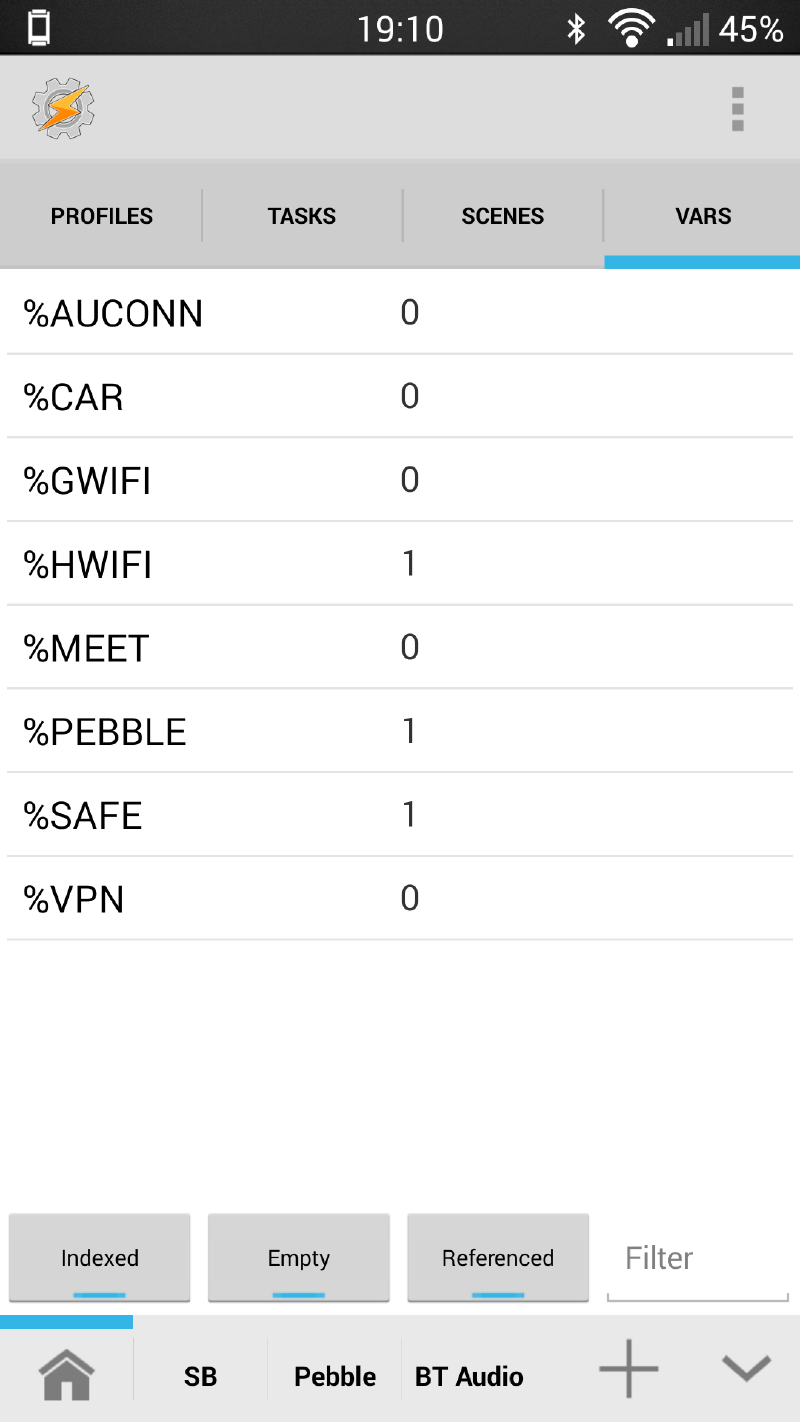
For reference, you can see a list of all your user variables – and their contents – under the ‘Vars’ tab, which is available to you after you enable ‘Expert mode’ in settings.
Using variables for Task flow control #
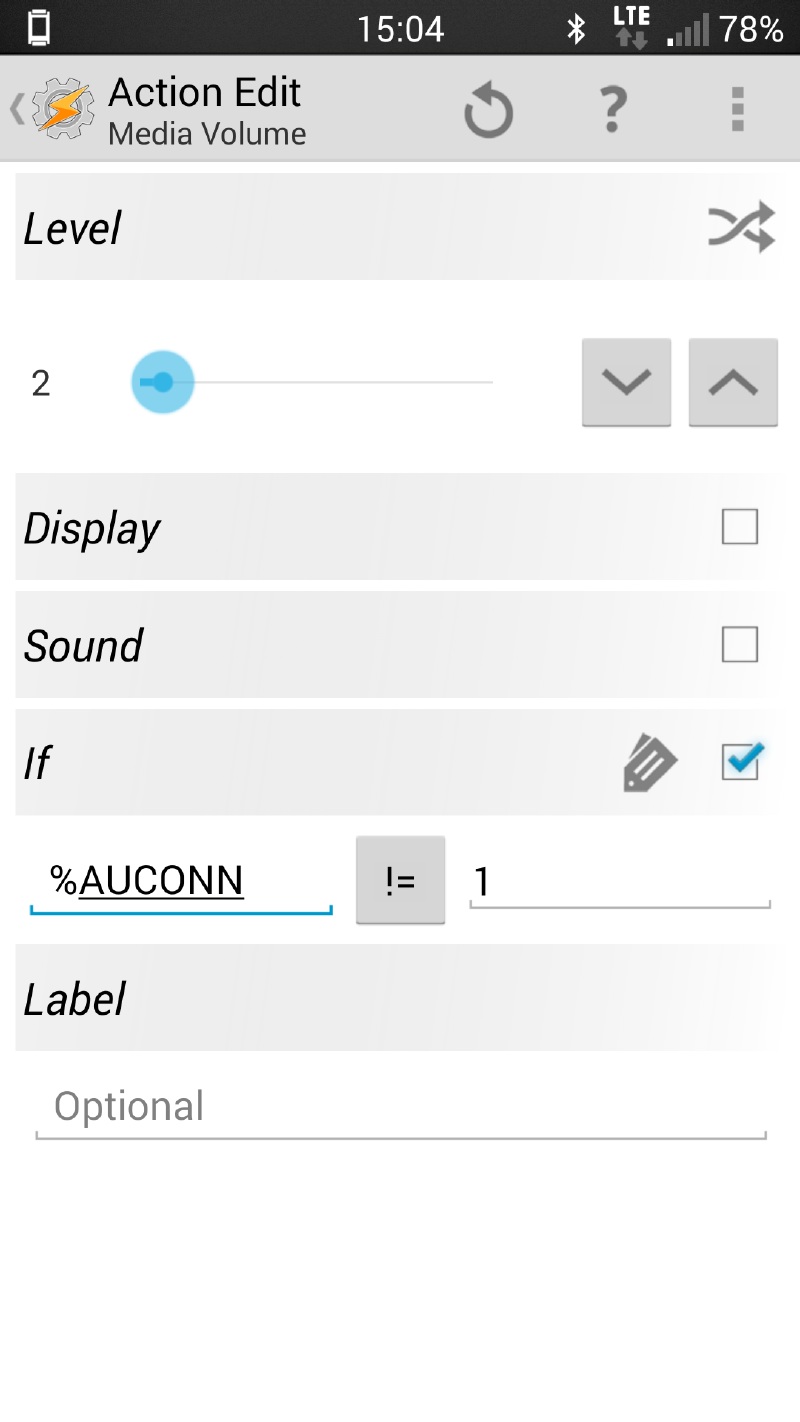
The most basic form of flow control is performed on a single Action. Almost every Action has an ‘If’ option available on its ‘Action Edit’ page that allows you to limit the circumstances – based on a variable – under which the Action can run. When the ‘If’ option is selected, you need to specify: the variable in question; the condition that it will be assessed against (equals, is less/more than, does not equal etc.); and the value to compare the variable to.
So, following our example, tap the ‘Media Volume’ Action on your Work Task’s ‘Task Edit’ screen to open its ‘Action Edit’ screen. Next, find and select the ‘If’ option, and specify: ‘%AUCONN’ as the variable; ‘!=’ (or ‘Maths: Isn’t Equal To’) as the condition; and ‘1’ as the value. This Action will now only be performed if the variable %AUCONN doesn’t equal 1 (i.e. I don’t have my headphones connected). Handily, Actions that will be performed if the Task were to run right now are marked in green on the Task Edit screen, while those that will be skipped are marked in red.
If you want more than one Action to occur based on a single variable value, or different Actions to occur given different values, then an ‘if/else/end’ statement is more suitable than adding ‘If’ conditions to individual tasks.
Adding an ‘if/else/end’ statement to a Task is as simple as adding an Action – start by pressing the ‘+’ button on the bottom of the ‘Task Edit’ screen, then selecting the ‘Task’ category and choosing an ‘If’ Action. Next, select the appropriate variable, condition, and value for it to execute under (such as %AUCONN != 1). Now, just drag any of the Actions to be performed under these conditions so that they sit directly underneath it, and finish it off with an ‘End’ Action, also under the ‘Task’ category.
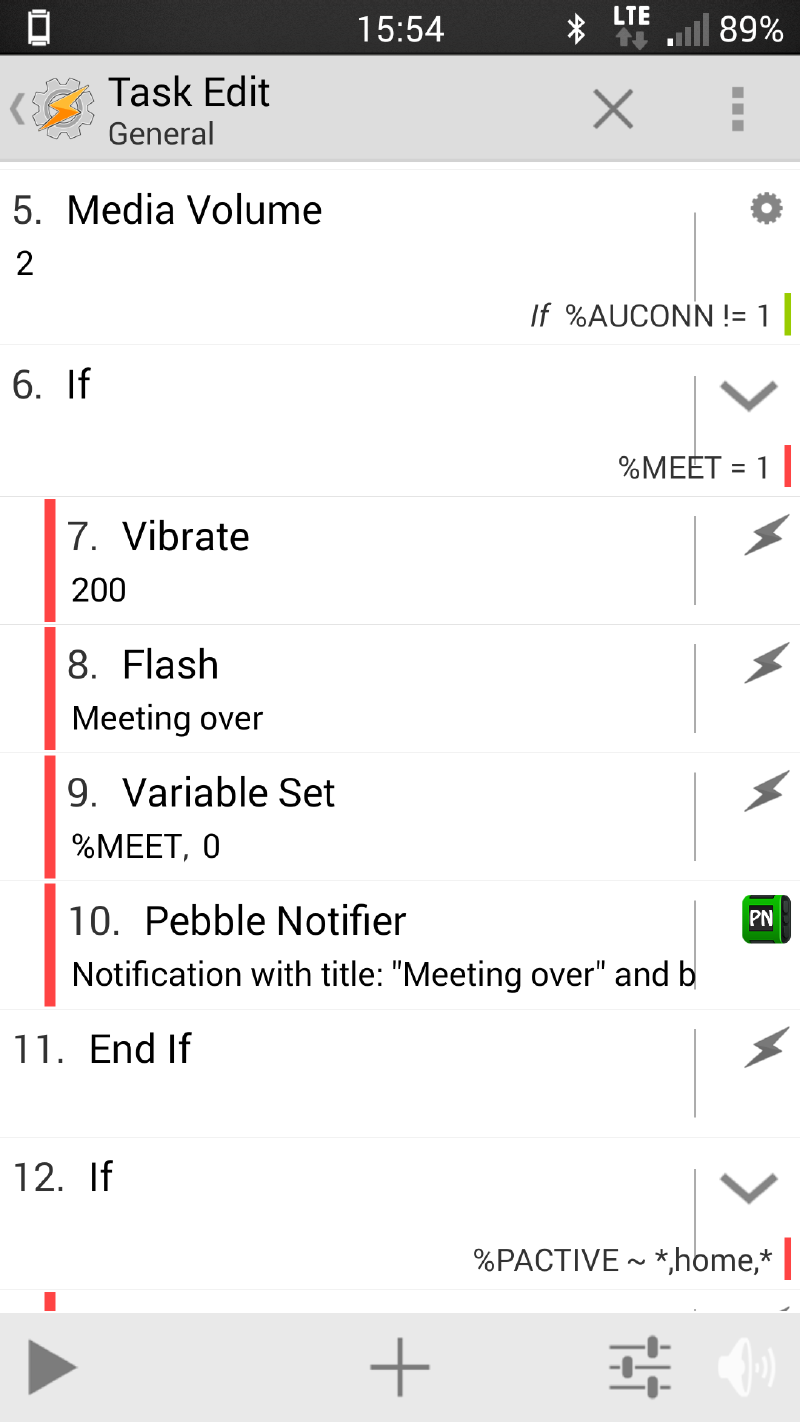
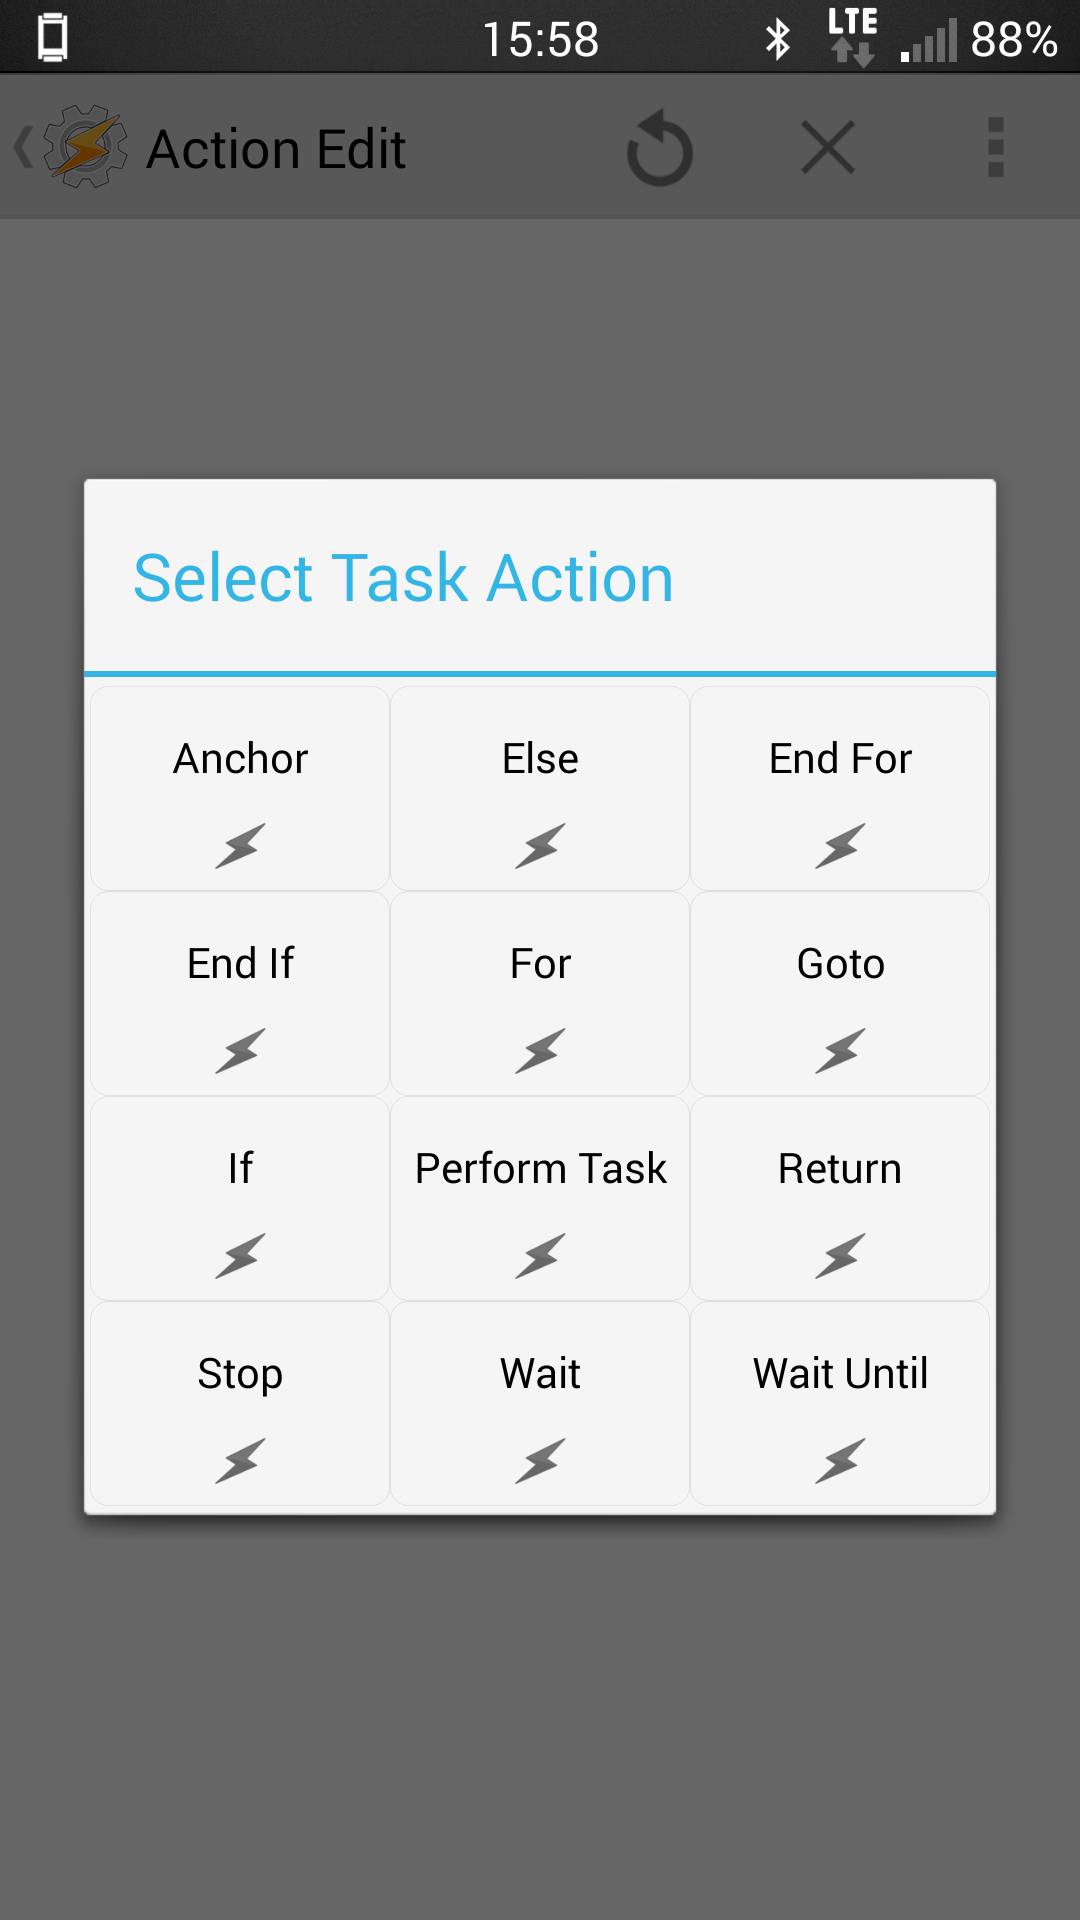
Optionally, you can add an ‘Else’ Action, or any number of ‘Else If’ Actions, before the ‘End’ Action – ‘Else’ allows you to specify Actions that will run if the initial ‘If’ condition wasn’t met, whereas ‘Else If’ will perform another ‘If’ statement if the previous ‘If’ condition wasn’t met.
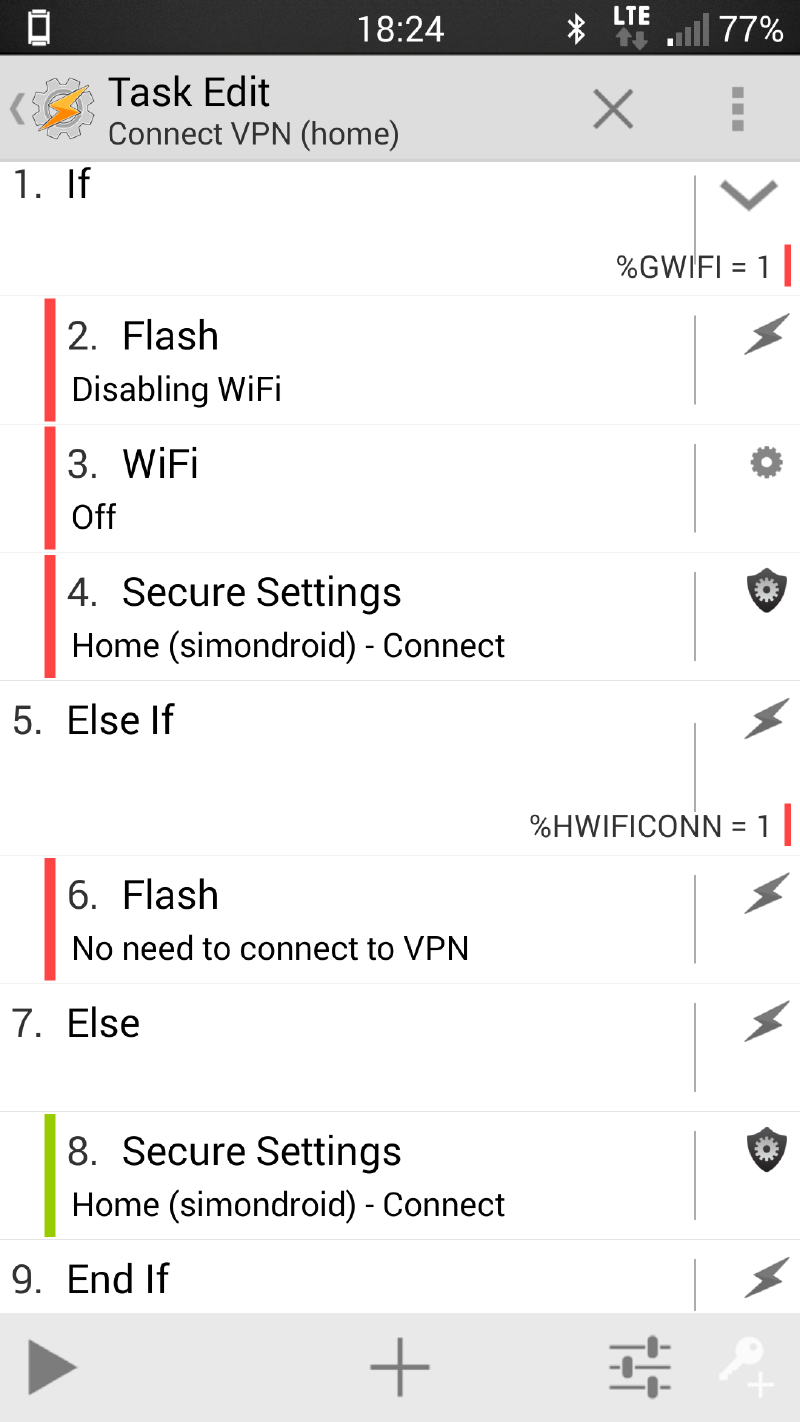
Of course, the situations covered here work just as easily for built-in variables as they do for user-created ones, so feel free to swap %AUCONN for %PACTIVE (a list of active Profiles), %BATT (the battery level) or any others found in the Tasker user guide.
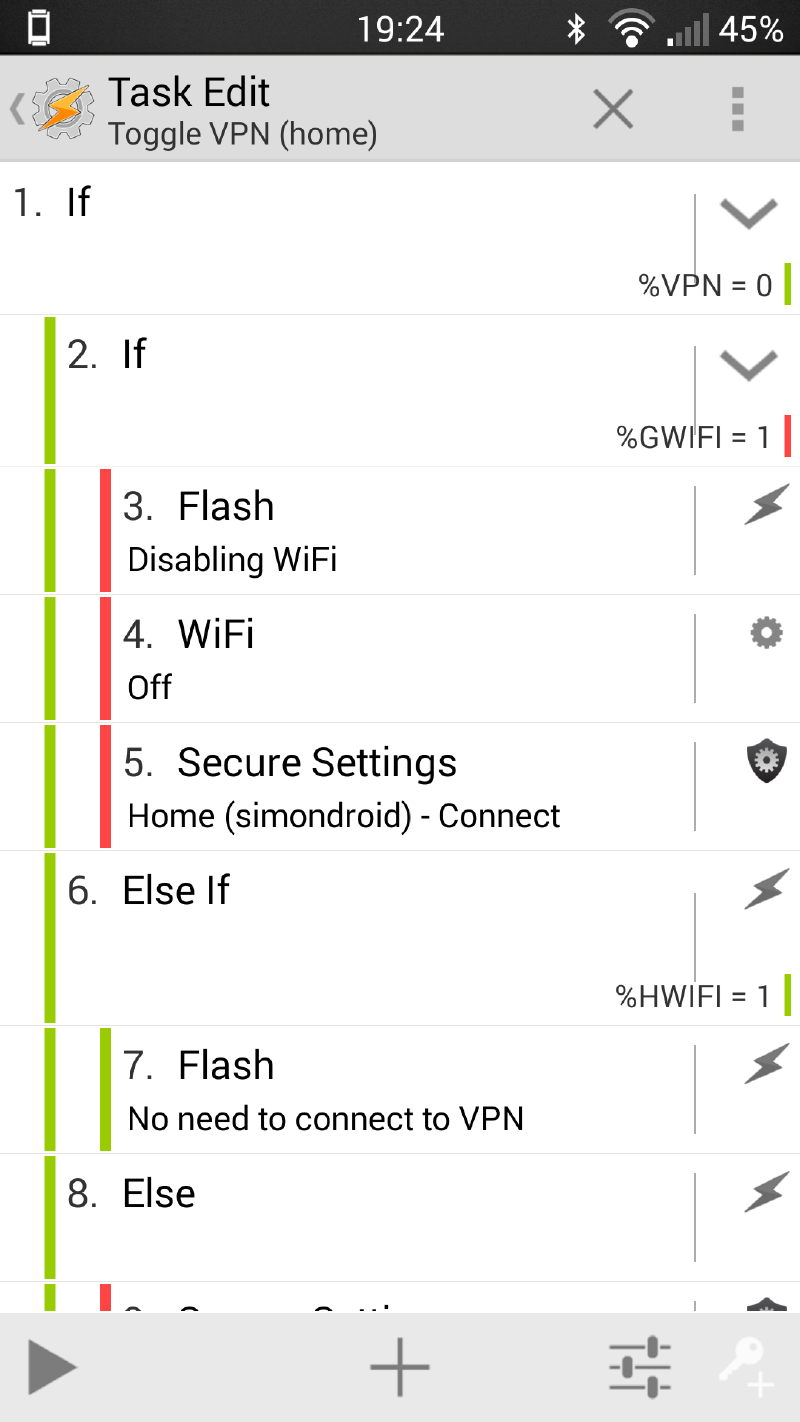
Actions for Flow Control.
Some powerful Actions you can add into ‘If’ statements include: the ‘Stop’ Action, which immediately stops the task; the ‘Jump To’ Action which will skip down the list of Actions within a Task until it reaches an Action with a matching Label (you define an Action’s label on its Action Edit page); the ‘Wait Until’ Action, which will pause the Task until a specified variable has a defined value; and the ‘Perform Task’ Action, which allows you to run any of the Tasks that you have created.
And, of course, stay tuned next month for Part3, where we’ll cover using data from the web. In the interim, don’t be afraid of the Tasker Userguide).