


Tasker becomes really powerful when you start feeding external information to it.
In previous issues, I introduced you to my favourite of all the Android apps – Tasker. I walked you through the basic ideas and language, and got you thinking about the different contexts in which it could help you. Then I taught you how to use Variables to improve the way that Actions were performed.
Hopefully, you’ve now created some context-sensitive ‘smart’ tasks using variables, but you might be wondering how you can use variables as more than just ‘flags’ in your tasks. Well, Tasker can also pull data from webpages and then act on that data accordingly. For instance, when your alarm sounds in the morning, you can have Tasker pop online to find today’s maximum temperature and warn you if you should grab a jacket or not.
At the very heart of this is the Tasker Action ‘HTTP Get’. This allows Tasker to query any webpage, and pull down its source code to be parsed and have its useful info extracted. The data that is pulled by HTTP Get is stored in the in-built variable %HTTPD.
To extract the data that you need from %HTTPD, you can’t just run a search – you need to split it into different variables using a number of strings. We do this by using the Variable Split Action.
But, first things first: let’s find some weather data to work with.
Given the requirement of later splitting the info, I find it easier to pull down an RSS feed or other XML file, rather than a standard webpage, as these contain usefully tagged elements. My preferred feed is from Weather Underground, as they supply an API for just this purpose. However, you need to sign up for a free account. If this doesn’t appeal to you, try your luck with an RSS feed, e.g. http://rss.weather.com.au/nsw/sydney.
So, first things first, sign up for an API key at http://www.wunderground.com/weather/api/. Then, simply specify a project name, verify your email, and make note of the key they gave you.
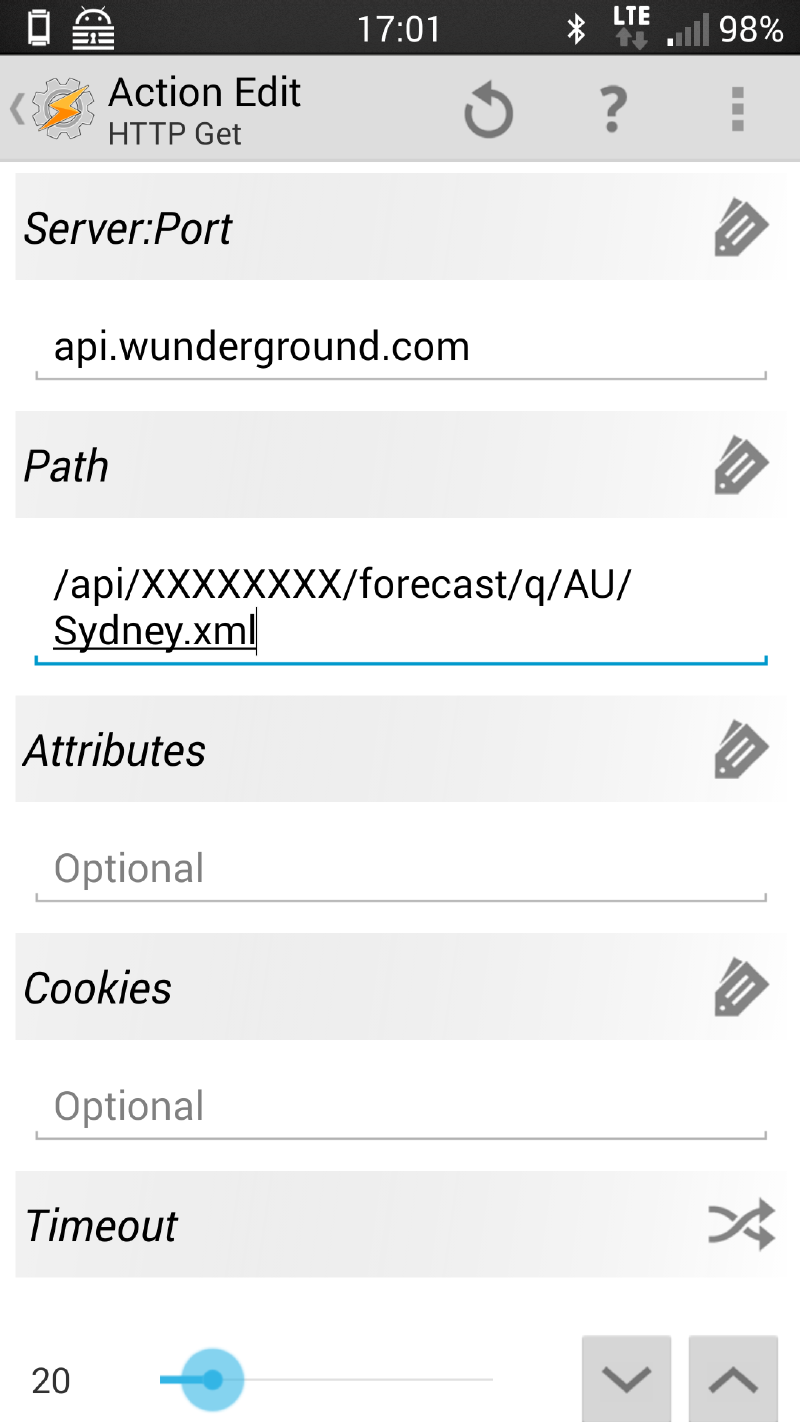
Next, open Tasker and create a new Task – I named mine ‘Forecast.Get’ – and add an HTTP Get Action. In the ‘Server:Port’ section, type ‘api.wunderground.com’ (without the quotes) and in ‘Path’ type ‘/api/XXXXXX/forecast/q/AU/Sydney.xml’ (or Melbourne.xml, or another suitable URL from http://www.wunderground.com/weather/api/d/docs?d=data/index), making sure to replace XXXXXX with your API key.
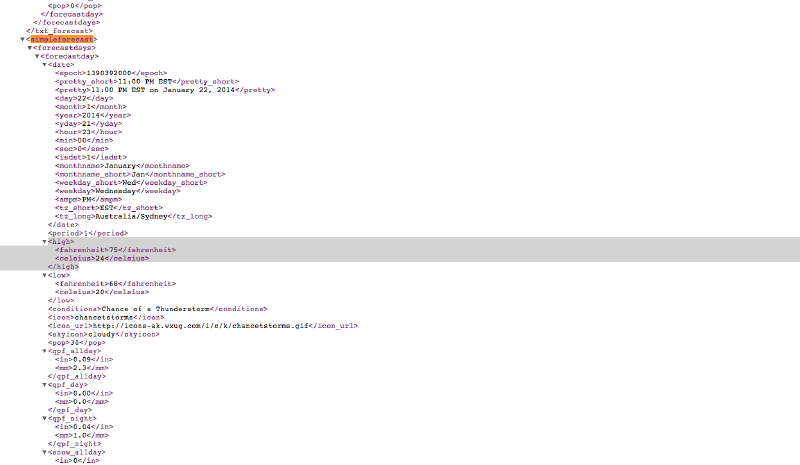
Running this task will now populate the in-built variable %HTTPD with the data seen at http://api.wunderground.com/api/XXXXXX/forecast/q/AU/Sydney.xml. In the next step, we will parse this data for the info that we’re interested in: today’s max temperature. This is a fiddly process, so I recommend opening up the XML in your PC’s browser, so that you have an easy reference point.
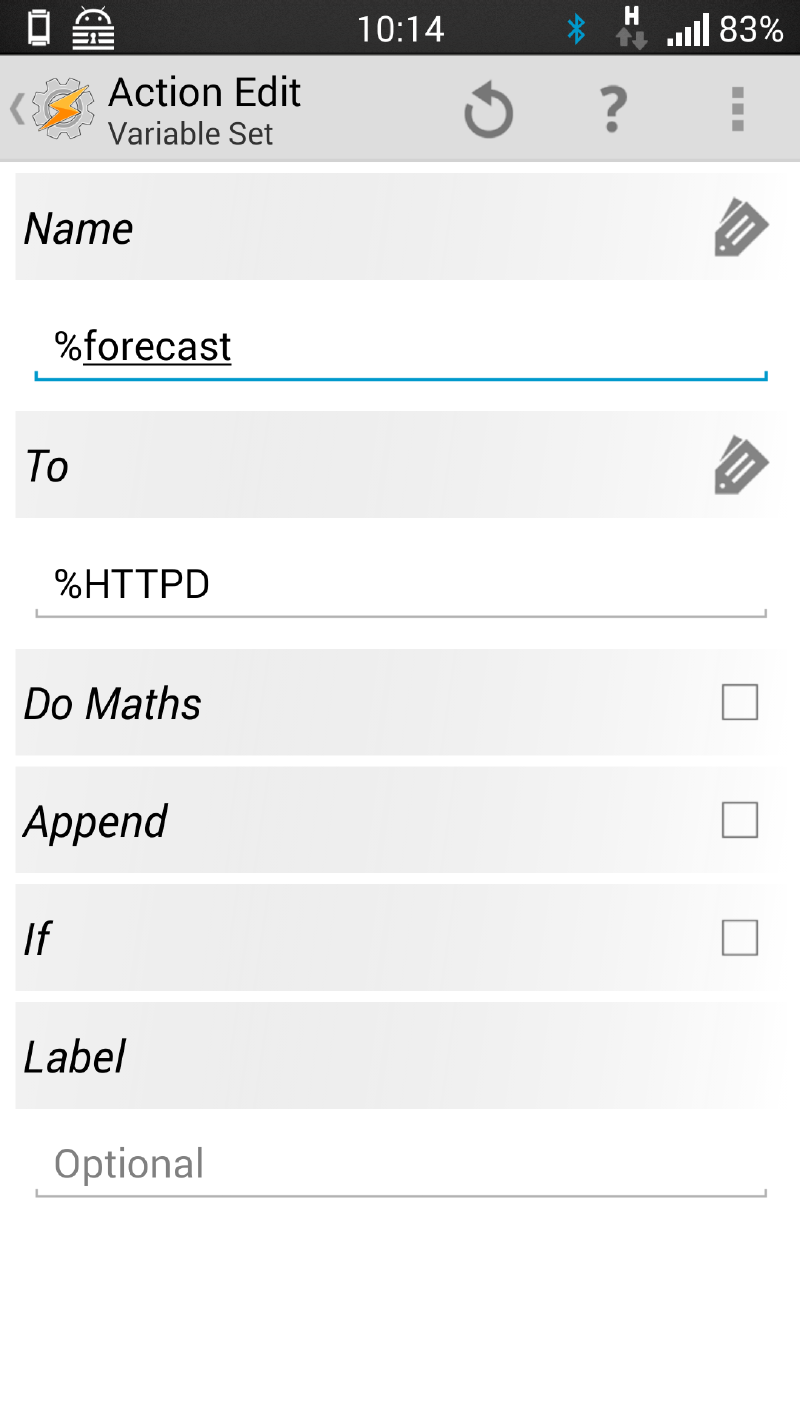
To make sure that the data is stored in a variable with a useful name, I first create a Variable Set Action that copies %HTTPD to the variable %forecast (note the lower-case lettering, which sets it as a local variable).
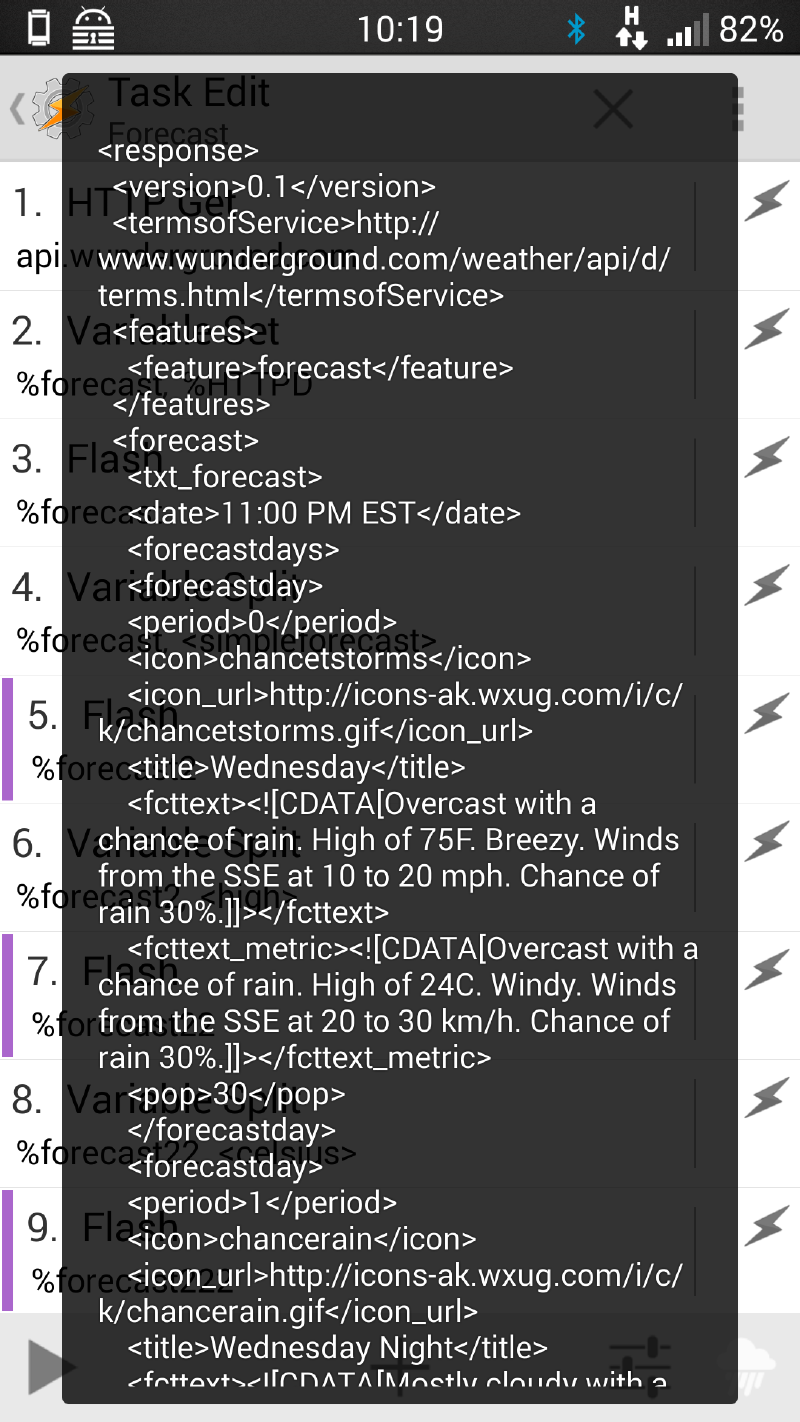
To make sure that everything is working correctly up to this point, I recommend adding in a ‘Flash’ action containing %forecast, then running the task and checking that the toast notification matches the content that you’re expecting.
The next part is a series of Variable Split Actions, each one reducing the %forecast variable down until we’re left with only the value we wanted.
The XML file that we’re working with has the Max temp value contained in a section tagged
What the Variable Split action does is look for a specific string of text within a variable, and then splits that original variable into a new one every time it finds that text. For instance, say the variable %delicious contains ‘ice cream,cheese,dumplings’. Using the Variable Split Action with ‘,’ specified will create the variable array of %delicious1 (ice cream), %delicious2 (cheese), %delicious3 (dumplings). If you were to then run the Variable Split on %delicious1 with a space defined as the splitter, you would end up with %delicious11 (ice) and %delicious12 (cream). Keep this in mind when you’re splitting second-generation variables if you had more than 10 variables created in the first split, as %delicious11 (as in one point one) will overwrite %delicious11 (as in eleven).
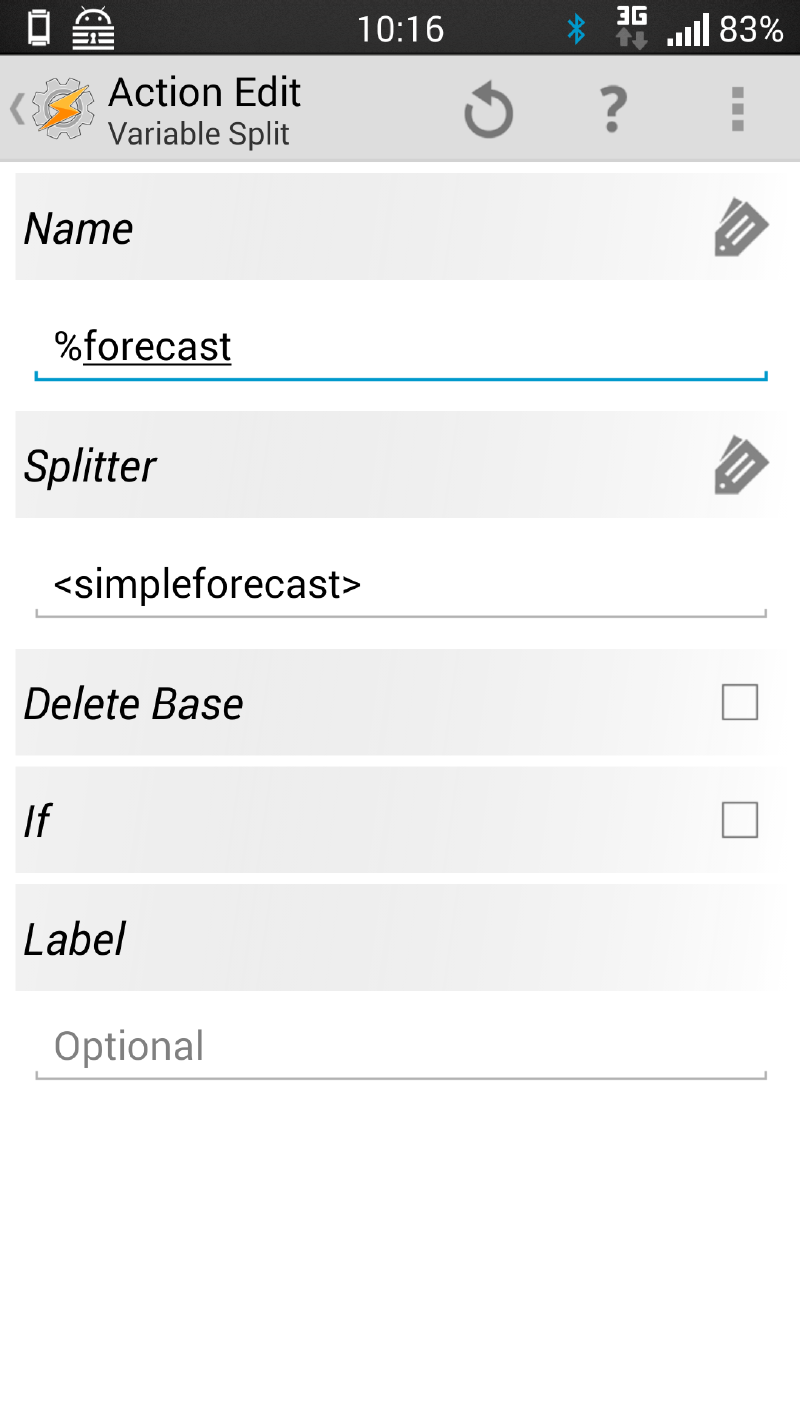
So, let’s start splitting up %forecast. First, split it by
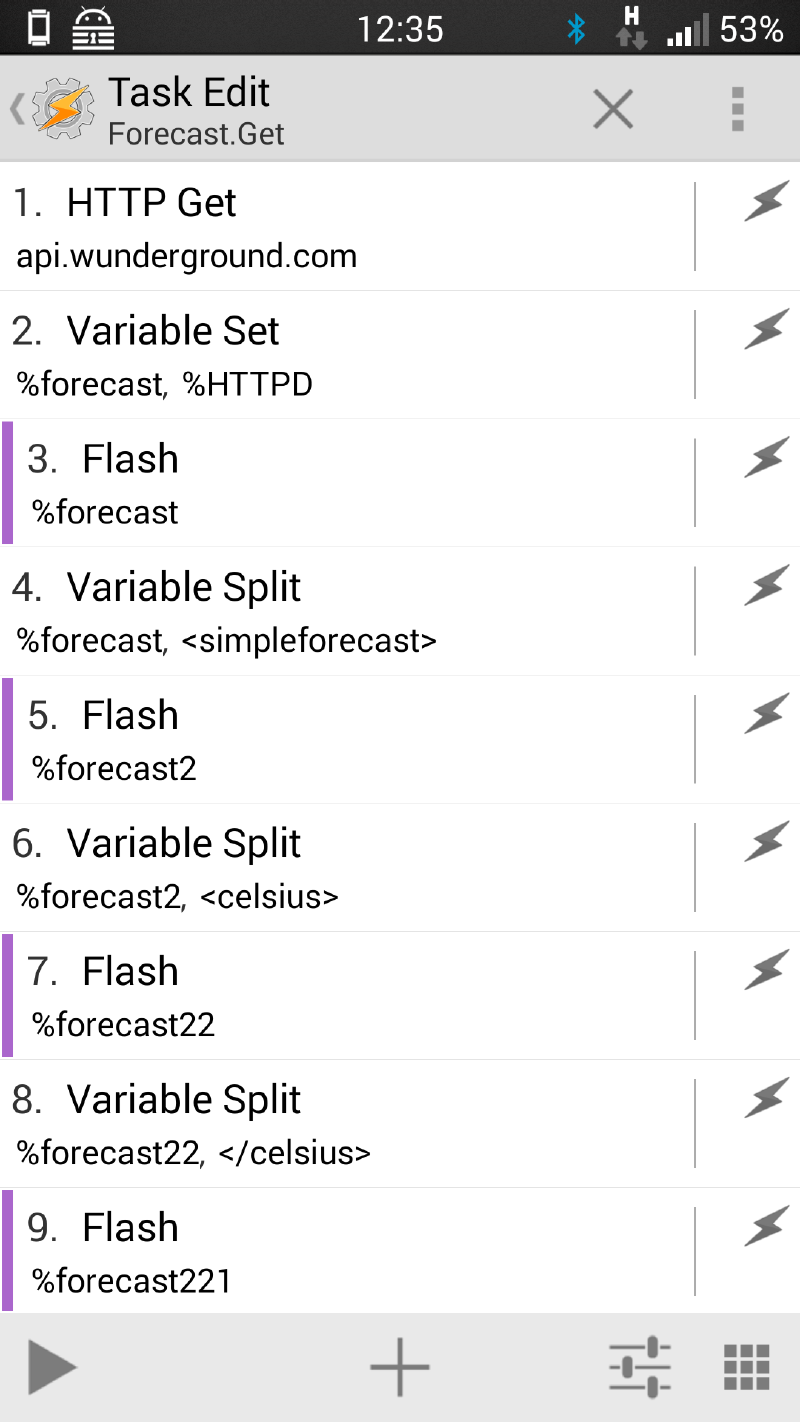
Continue with another Variable Split to isolate the first Celsius section (it contains the
Finally, split %forecast22 by to isolate the Max value. So that I can use this variable in other Actions, I next write %forecast221 to the global variable %WMax, using a Variable Set Action. Compare this value to the value you expected from your XML file. If it differs, you’ll need to troubleshoot your Variable Splits and arrays using Flash Actions.
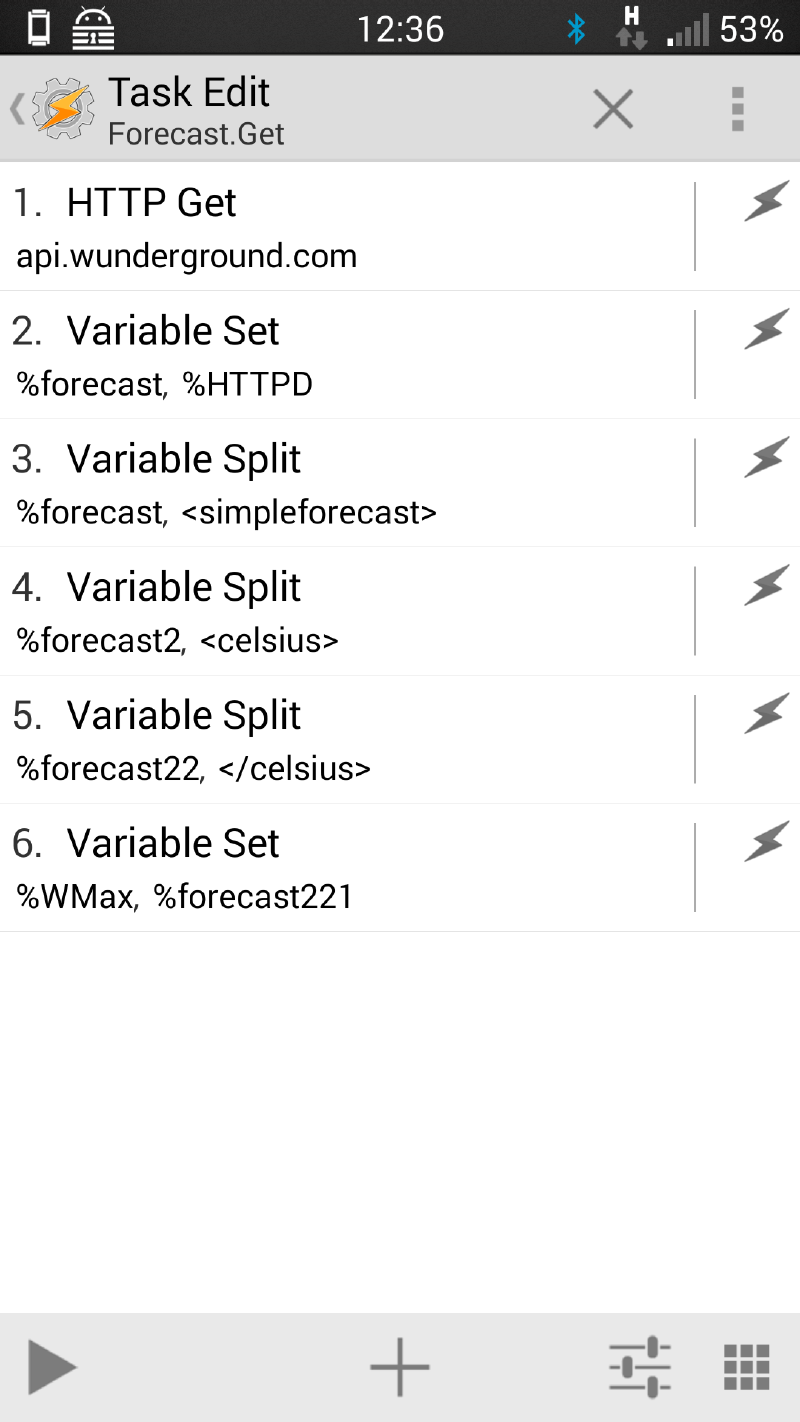
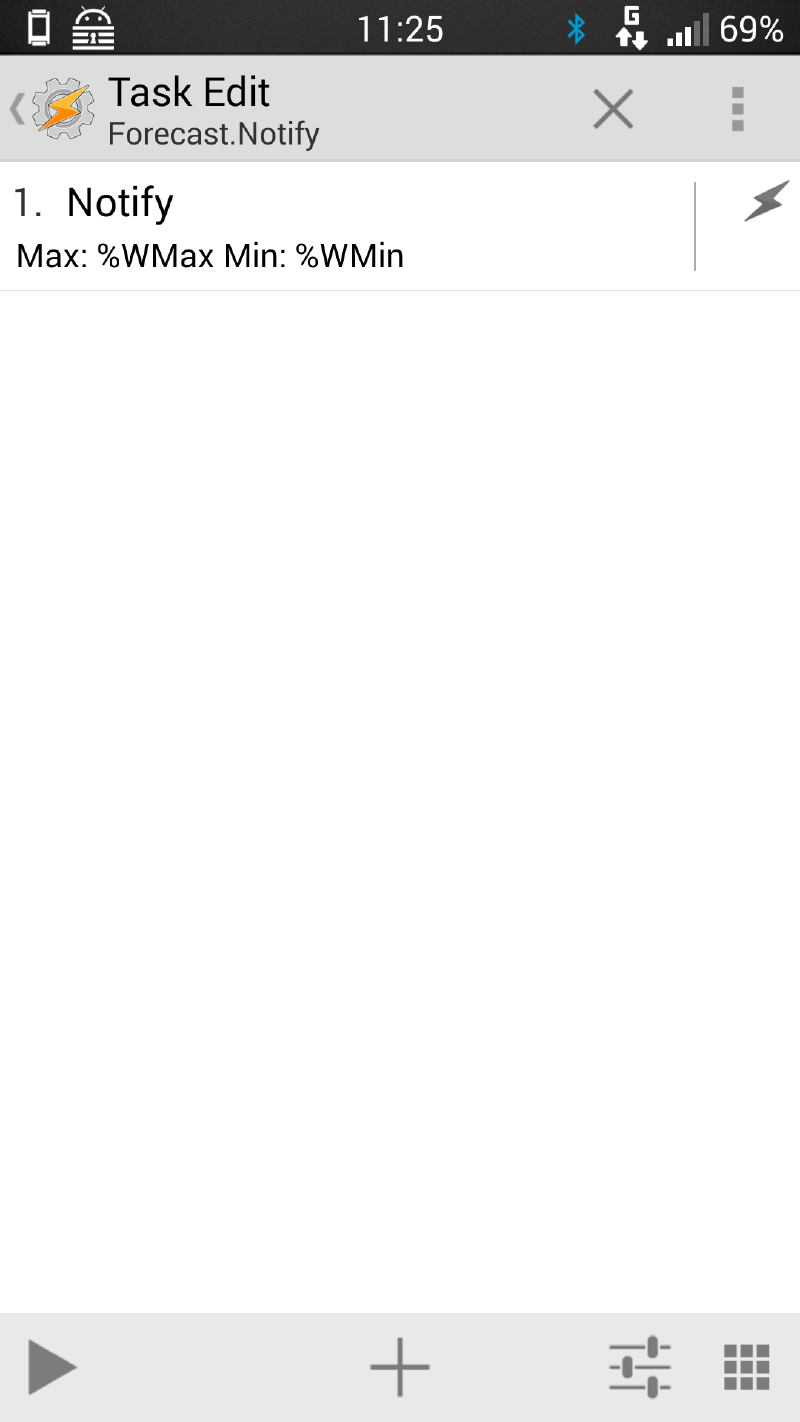
Now that we have a variable for today’s max temp, we can display it in another task, or even perform logic on it (e.g. if %WMax < 17 set %Clothes to “Better grab a jacket!” etc.). So, it’s now almost trivially easy to place %WMax in a notification (using the Notify Action with Title specified as ‘Max: %WMax’). You can then call this Notification task either at a specified daily time (creating a Profile using a Time event), or even after your alarm triggers (a Profile based on the Alarm Clock Event – although, this won’t work on all phones, so you may have better luck using Gentle Alarm and its Tasker plugin).
One problem with the alarm clock that I mentioned is that the location of the forecast is static. Advanced users may enjoy the project of replacing part of the URL called in the HTTP Get request with the Tasker variable %LOCN (the battery-friendly ‘Location by network’). Info on how to get the API to accept Lat/Lon coordinates is available at: http://www.wunderground.com/weather/api/d/docs?d=data/index.
And so concludes my three-part series on the ever-powerful [Ed: and still maintained in 2026! - although by a new person] Android automation app, Tasker. I hope you have found some use for it. Personally, I think it’s the best app on Android.