
Experience the peace of a flawless music library
A clean music collection is essential for pain-free digital musical enjoyment. If your musical library is full of inconsistent, incorrect, or missing tags, then you’re not only making the ghost of Steve Jobs cry, you’re unnecessarily making your listening times more difficult.
Thankfully, digital Zen is easily attainable, and, with it, the nirvana of pain-free musical navigation.
First though: what’s so bad about a messy library? And doesn’t the pain of cleaning it up outweigh the pain of living with it?
In response to the first question, it’s now common-place to stream music across the house (whether via iTunes, Sonos, UPnP [e.g. PlayStation or Xbox], or some other solution) and a messy library makes it difficult to find the song that you want to hear – as you’re never sure if that elusive tune is stored, for example, under ‘Eels’, ‘The Eels’, or ‘Eels, The’.
Secondly, there are a number of programs out there that can help you find bad, inconsistent, or missing tags, and fill them in automatically (when possible), or give you a means to fix them yourself (when not), so you have no reason to carry this unnecessary burden.
While iTunes’ media management does an ok job of keeping things in order, it doesn’t hold a candle to the power of MediaMonkey.
MediaMonkey (let’s call it MM) can actually serve as a near-complete replacement for iTunes, as it allows music & video playback, playlists, podcasts, syncing with iPods/iOS devices, etc. It comes in two versions: free and ‘Gold’ – with some of the Gold features appealing to heavy media users, but (thankfully) none of them are needed for cleaning up your library.
Every journey begins with a few (install) steps #
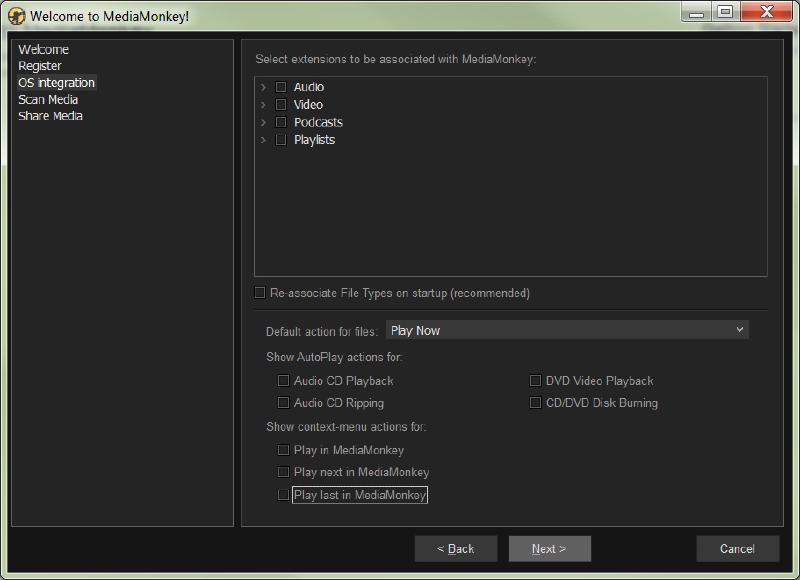
To get a hold of this almighty app, and the digital harmony that it brings, visit mediamonkey.com/download/. Upon first run, you’ll need to set up some features, the first being file associations. If you’re not interested in using MM as a music or movie player, then you need to de-select Audio, Video, Podcasts, and Playlists. You might as well also de-select ‘Re-associate File Types on startup’, as well as the auto-play options and context-menu actions, too.
The next page is where you have MediaMonkey scan for files. If you have all of your music stored in a single directory (please tell me that you do…), choose only that directory. If your music is scattered far and wide, it’s time to move all your music into a single directory – a big cut n’ paste job will be all you need right now, as you can use MM’s ‘auto-organizer’ once you’ve cleaned up your tags (which I’ll get to later).
If you have an UPnP/DLNA device that you’d like to play your music back on (eg a PlayStation or Xbox), and don’t already have a UPnP server installed, choose to ‘Share your library’, otherwise feel free to disable it.
Now, let MM scan your files, which could take a while, depending on the size of your collection – My 28,000 song library took about 25 minutes.
Filling the voids #
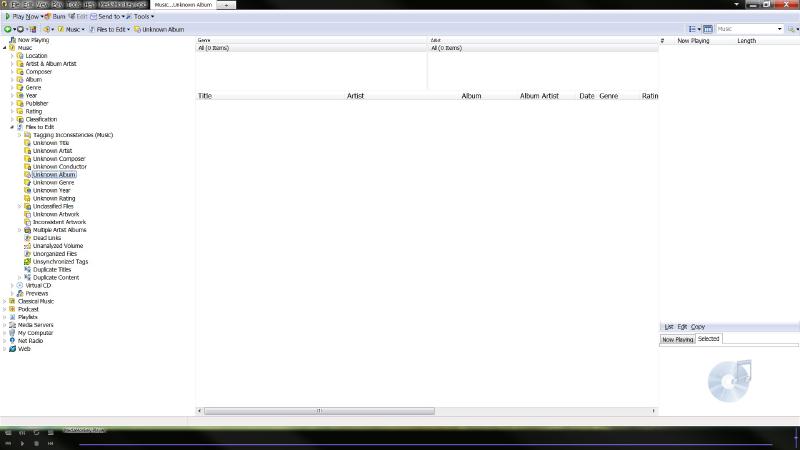
Once MM has finished scanning, the first thing to do is find any items in your collection that are missing tags like Artist, Album, Track#, Title, Year, or Genre. On the left side of the screen, expand the ‘Music’ heading, followed by ‘Files to Edit’. This provides a quick shortcut to those tracks with specific tag problems.
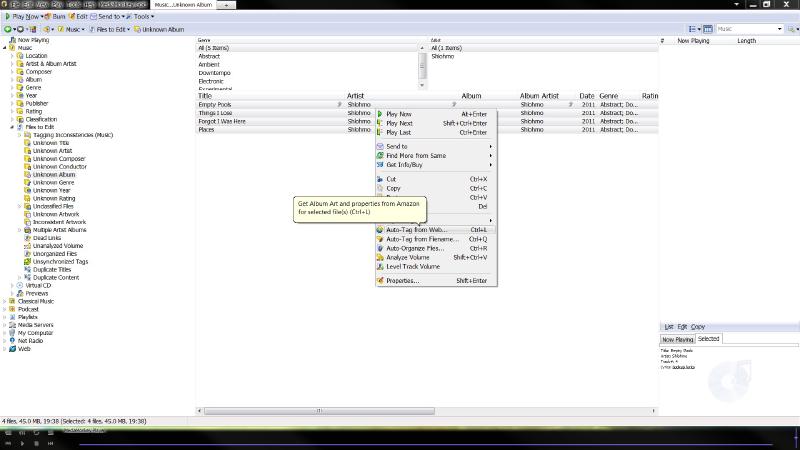
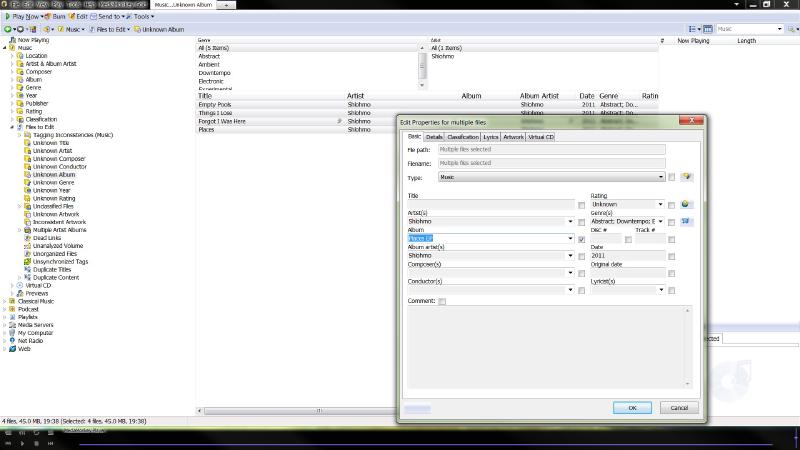
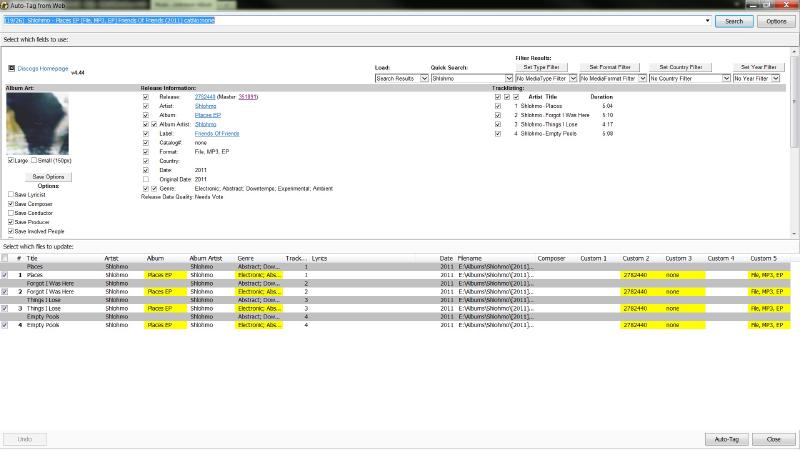
By clicking on one of the entries below ‘Files to Edit’, e.g. ‘Unknown Album’, you can see every track in your collection that is missing that info. To make bulk edits a bit easier, you can sort the list by any of the headings in the group, (sorting by Path or Artist could help), and then either manually fill in those missing values (highlight the entry in the main panel, right-click and choose ‘Properties’), add the info from the directory or filename (highlight, right-click, ‘Auto-Tag from Filename…’ and specify your folder/filename structure), or – more simply – use a web-service to more thoroughly fill in tags (highlight, right-click, ‘Auto-Tag from Web…’ and choose the correct album from the dropdown menu up top) – note that you can really only edit one album at a time, though, due to the way that the web search works.
If you already know what the missing tag should be, then it makes sense just to input it under Properties, but, if you need to enter individual track titles or several different tags, the web option can save effort – but only if at least one tag (preferably Album) is present.
I’ve not had the best luck with the default Amazon web-service, so I recommend installing the Discogs Tagger plugin/script. Just download and run the .mmip file, then change the source to ‘Discogs’ under ‘Options’ up the top right of the ‘Auto-Tag from Web…’ screen.
Attaining Nirvana #
To really neaten up your music library, you also need to fix bad tags. The best way to do this is to install the ‘Tagging Inconsistencies’ plugin/script. This plugin is what really makes MM worthwhile – it goes through your library and looks for common tag problems, such as inconsistent artist names, and highlights those albums that require attention.
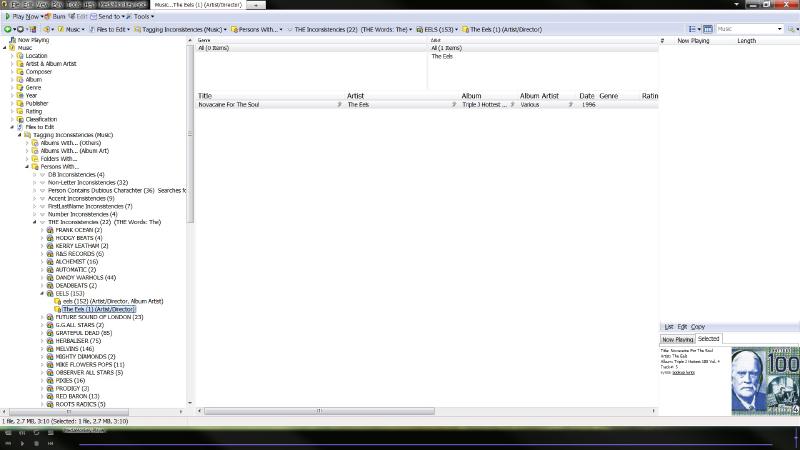
Once the script is installed, you can use it by navigating to ‘Music’ > ‘Files to Edit’ > ‘Tagging Inconsistencies’. The entries nested below ‘Tagging Inconsistencies’ group together any music files/albums/artists by their specific problems. The best place to start is by expanding the ‘Albums With… (Others)’ subheading, where a list of specific album tagging problems will then appear.
Expanding/clicking on any entry in this new list will show those artists/albums/tracks that have the specified problem (such as missing tracks, inconsistent genres, etc.). Note that not every entry in the list will actually be problematic – it’s up to you to decide what needs fixing.
It’s also up to you to fix any problems (manually, or with the methods described above), but it’s a fantastic way to highlight any problematic entries in your otherwise perfect music library – the ‘Persons’ section even allows you to track down the aforementioned inconsistencies surrounding ‘The’ in artist names, or inconsistencies with diacritics (e.g. Bjork vs. Björk), numbers (1 vs. One), and more.
Straightening the long and winding (folder) path
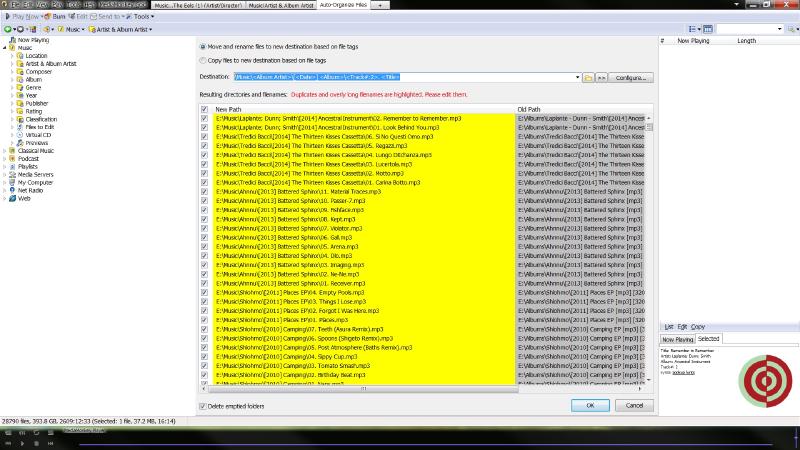
Once your tags are in order, you can use them to organise the file structure of your library folder by opening Tools > ‘Auto-organize files…’ and specifying your preferred structure. For example, I use:
\Music\<Album Artist>\[<Date>] <Album>\<Track#:2>. <Title>This act runs the risk of messing up your library, due to unexpected outputs (‘Various Artists’ albums, for instance) or syntax errors, so I’d really make a backup of all your music before going ahead with this.